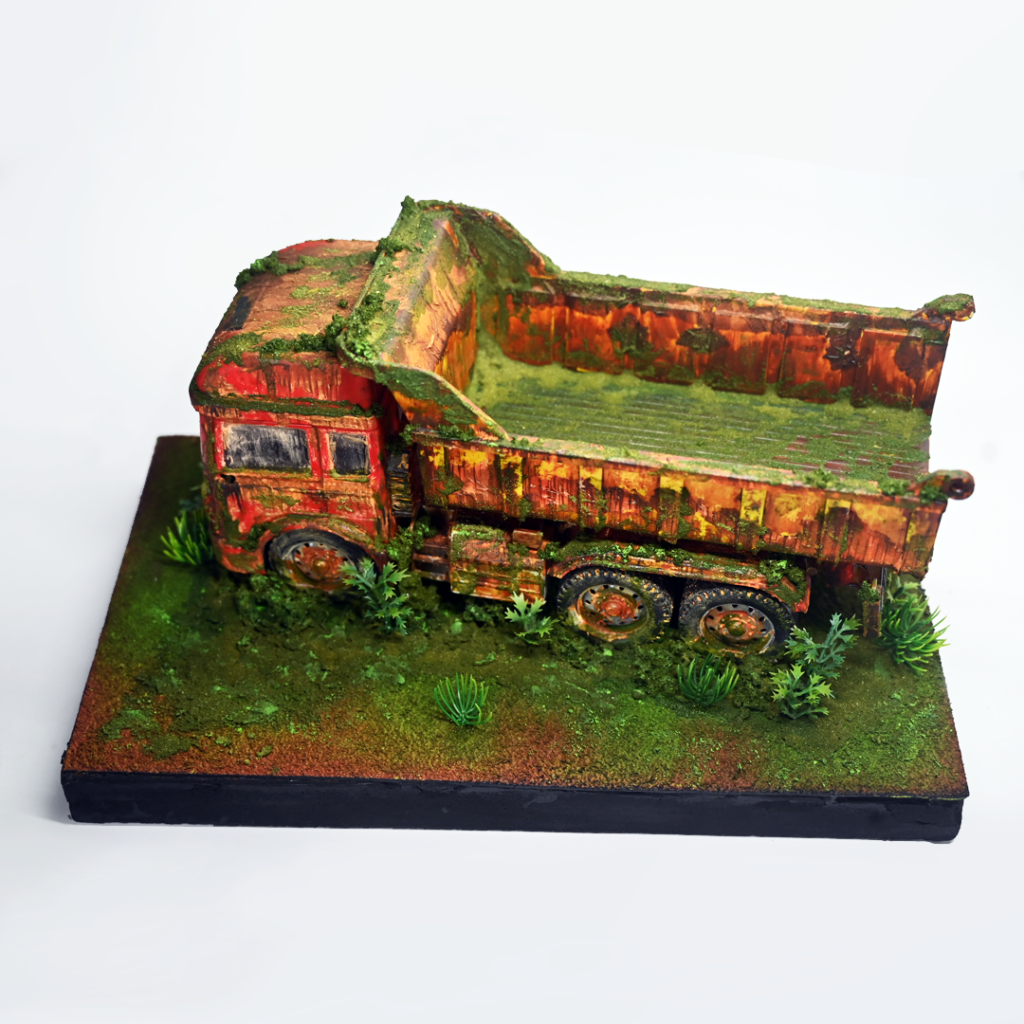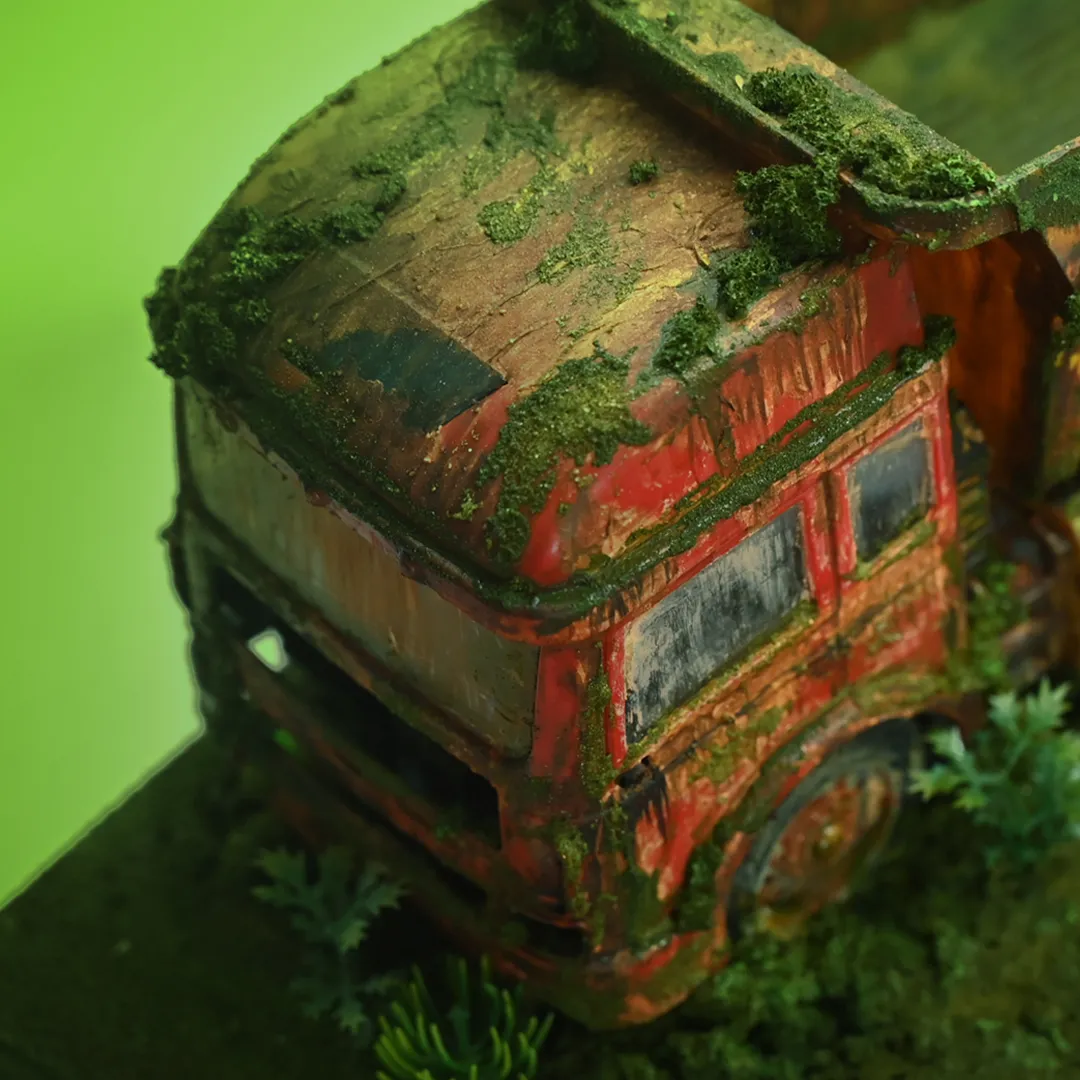
Creating a realistic, rustic, miniature abandoned truck model using a plastic toy truck.
“The subject of abandoned rustic vehicles captivates me, immersing me in a world where neglect transforms into artistry. Each rusted and weathered appearance tells its own story, evoking a sense of mystery and intrigue. Join me as I explore the creation process behind crafting a miniature abandoned truck model. Discover the art of model making and the beauty of decay in miniature truck models. Learn the techniques for realistic weathering and rust effects to bring model vehicles to life.”
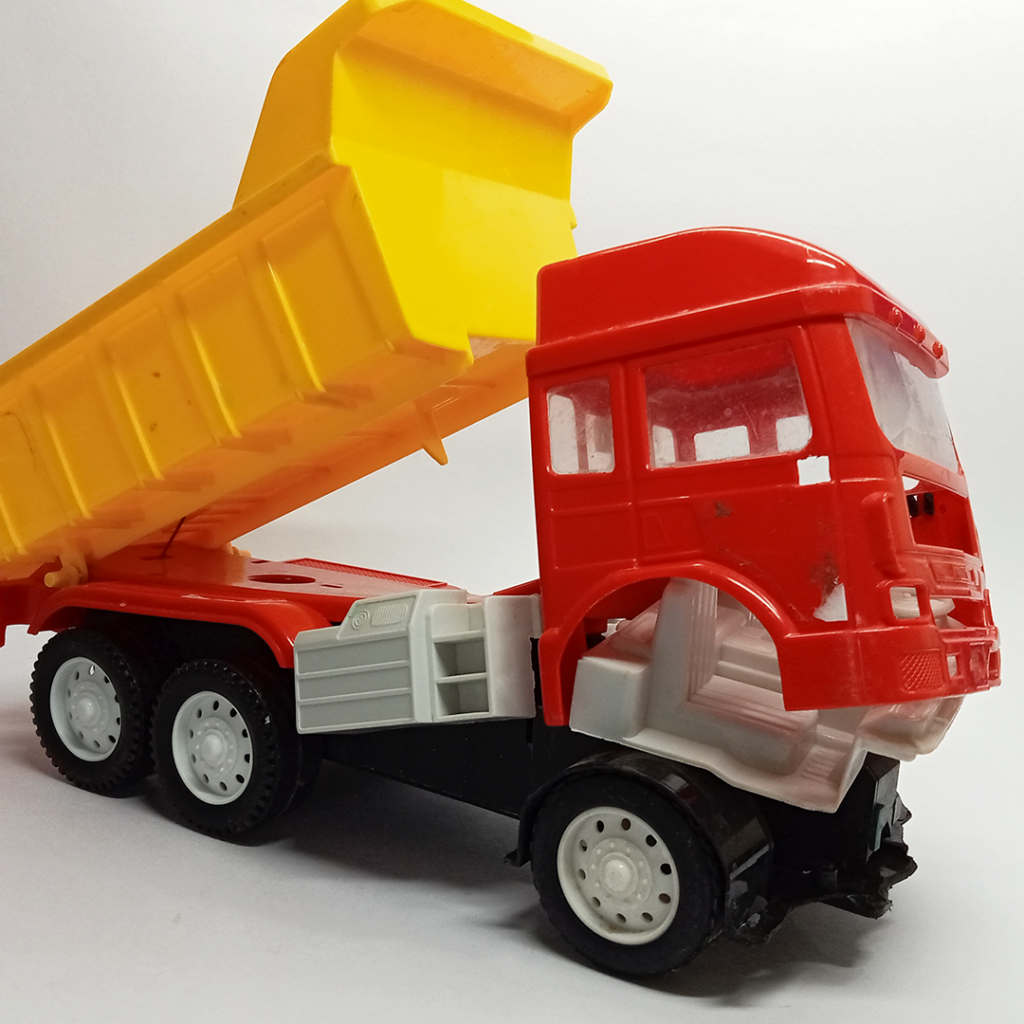
I’m repurposing a discarded toy from my son’s collection, giving it a weathered, rustic makeover. Inspired by a life-sized abandoned truck I saw near a harbor during my travels, this project captures a moment frozen in time.
Coloring Cabin
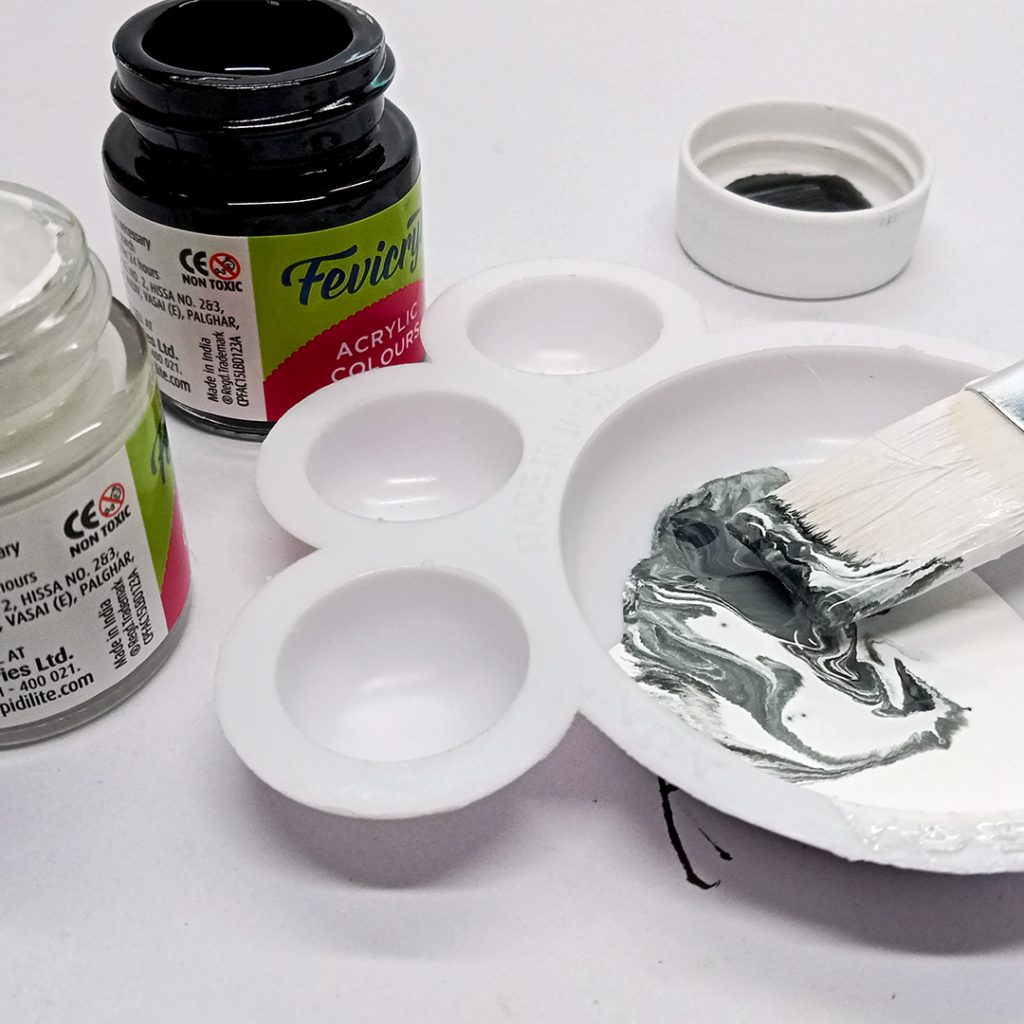
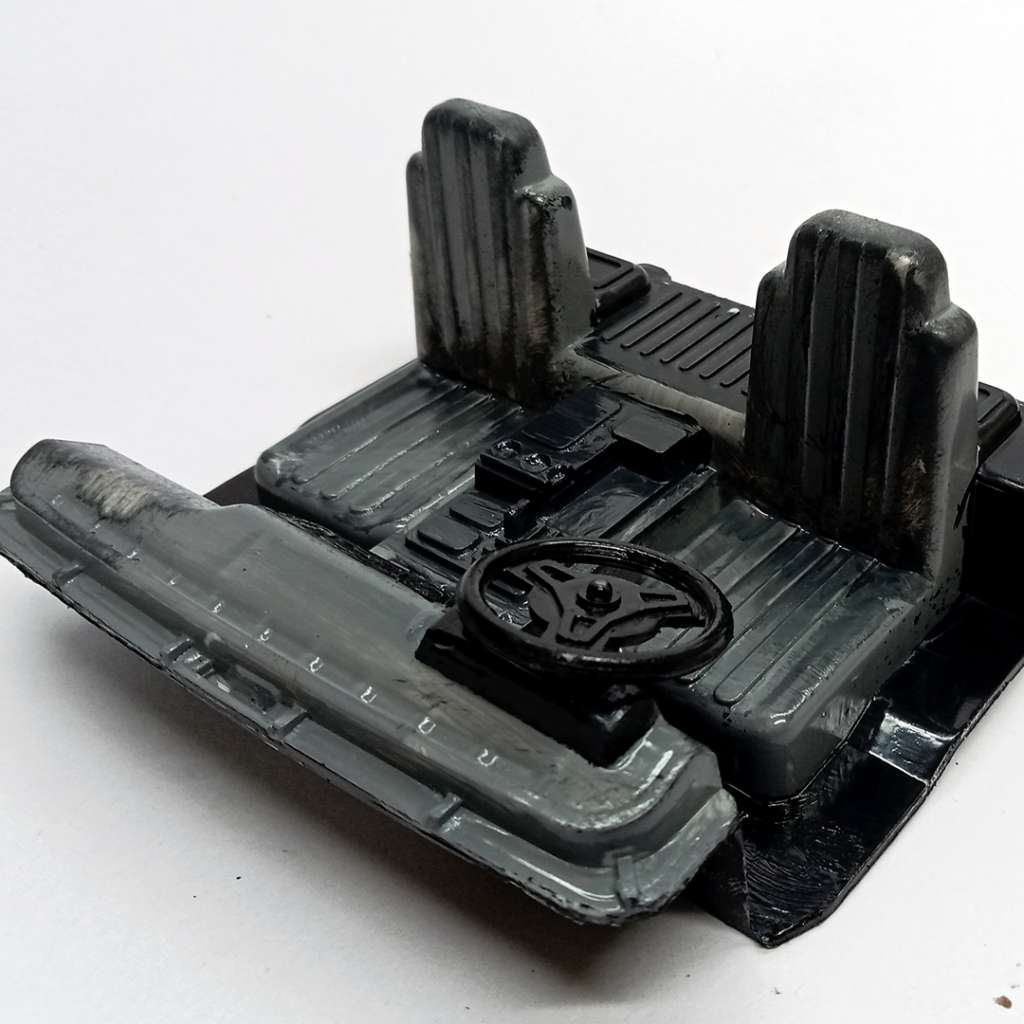
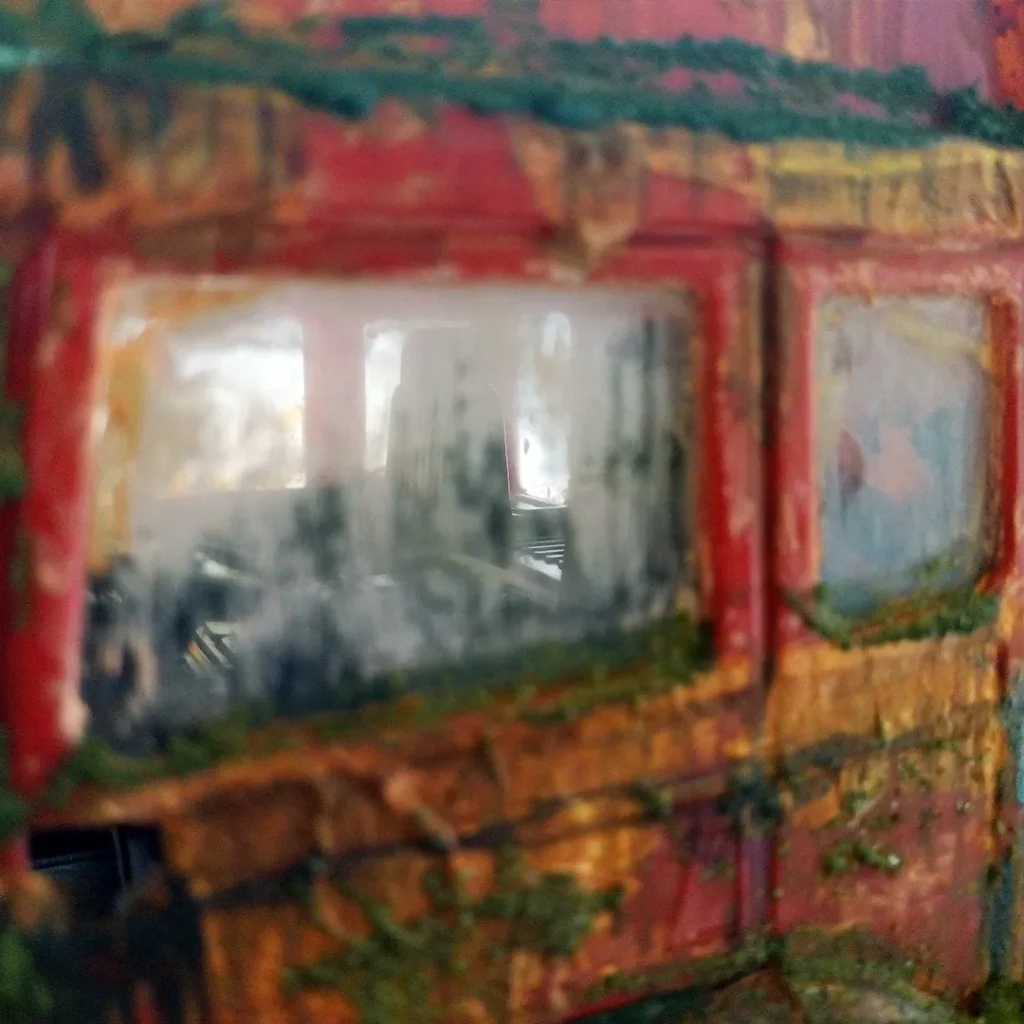
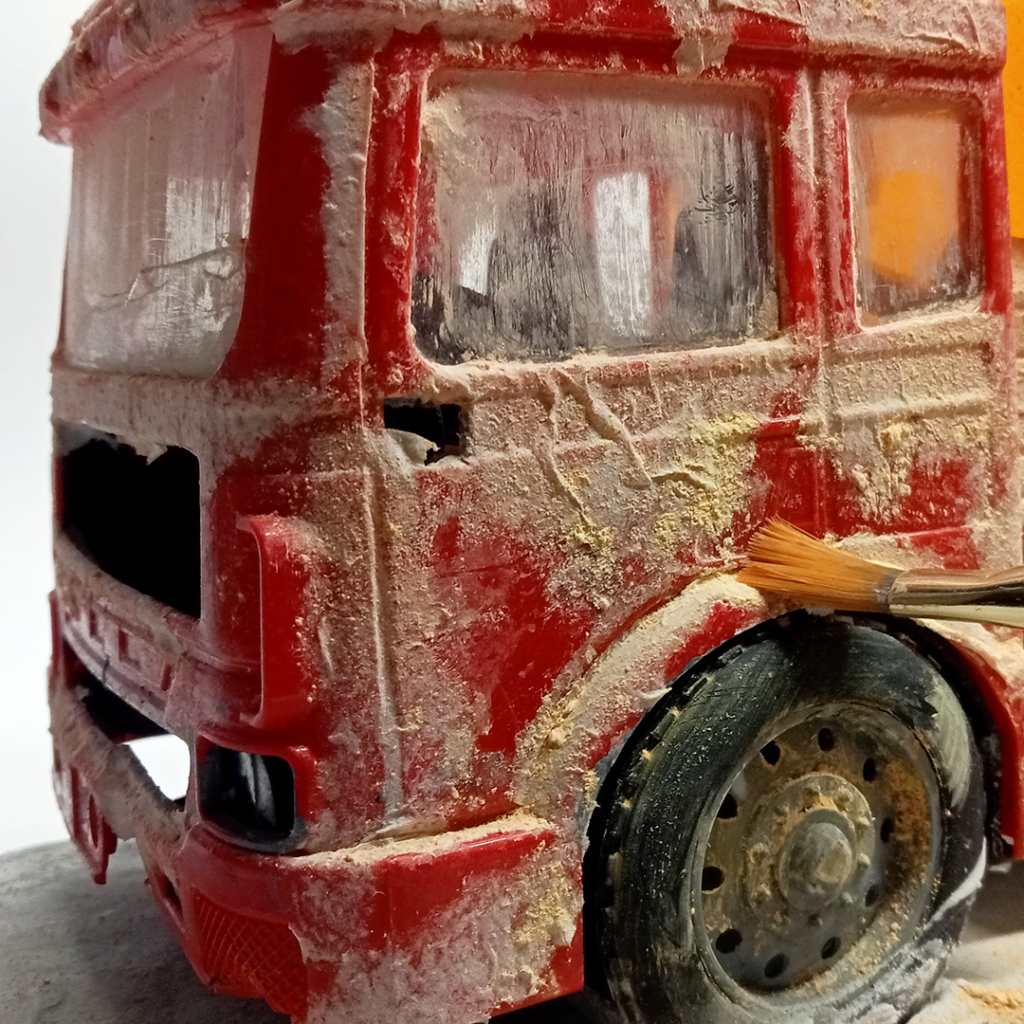
The cabin interior was completely white, so I began by focusing on the truck’s cabin interior. I applied shades of gray and black acrylic paint to create a realistic weathered look.
Rustic makeover
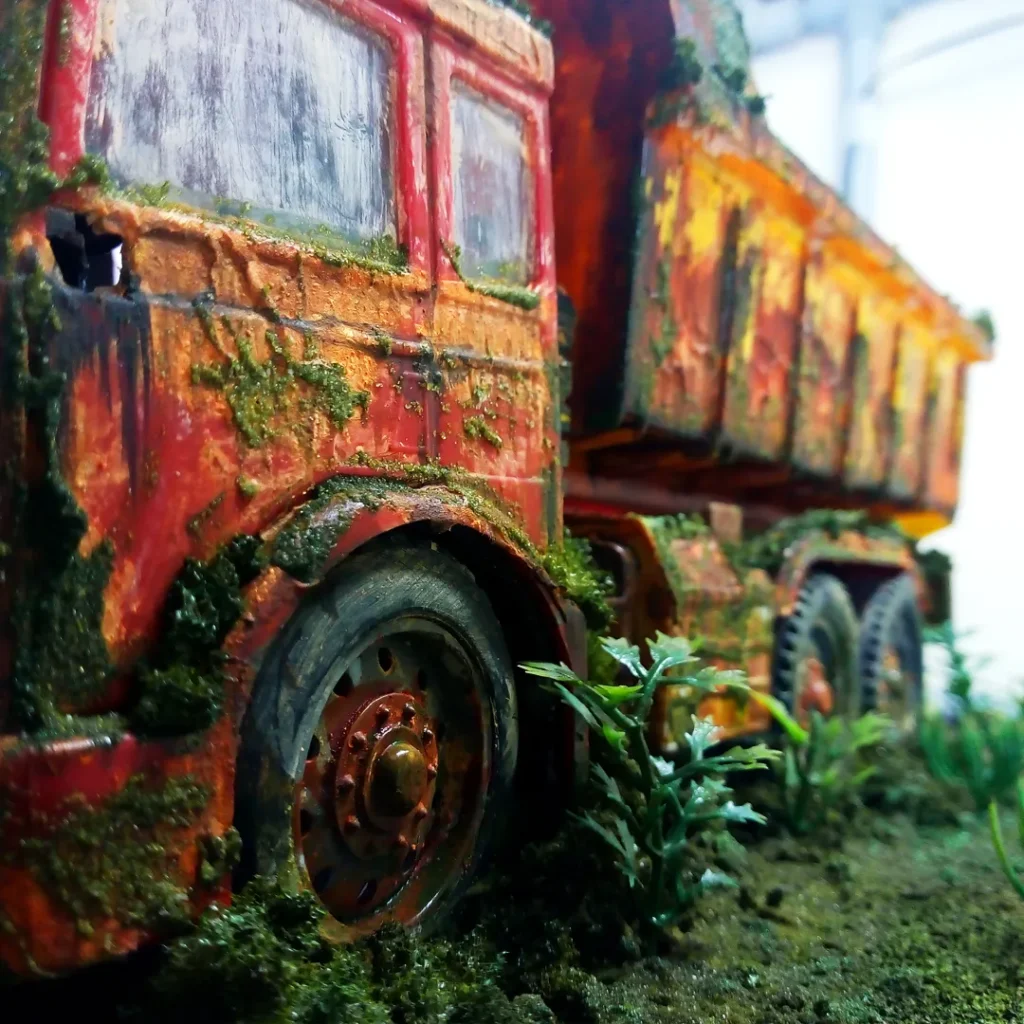
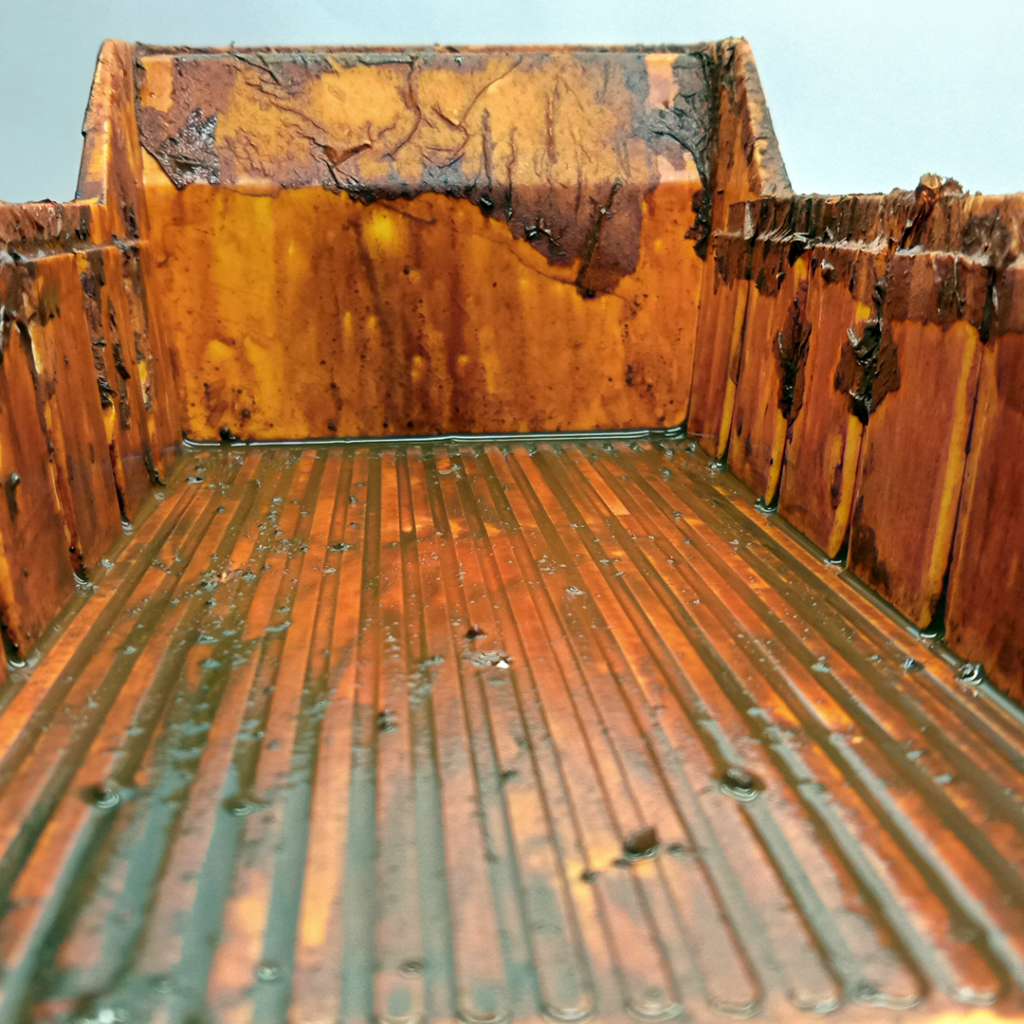
To give the truck’s body parts a rustic look, I used tissue paper and glued it to the truck’s surface with synthetic adhesive (Fevicol). This is easy method allows for the creation of a rustic texture and can easily modify the texture and color by wetting the tissue paper during the process.
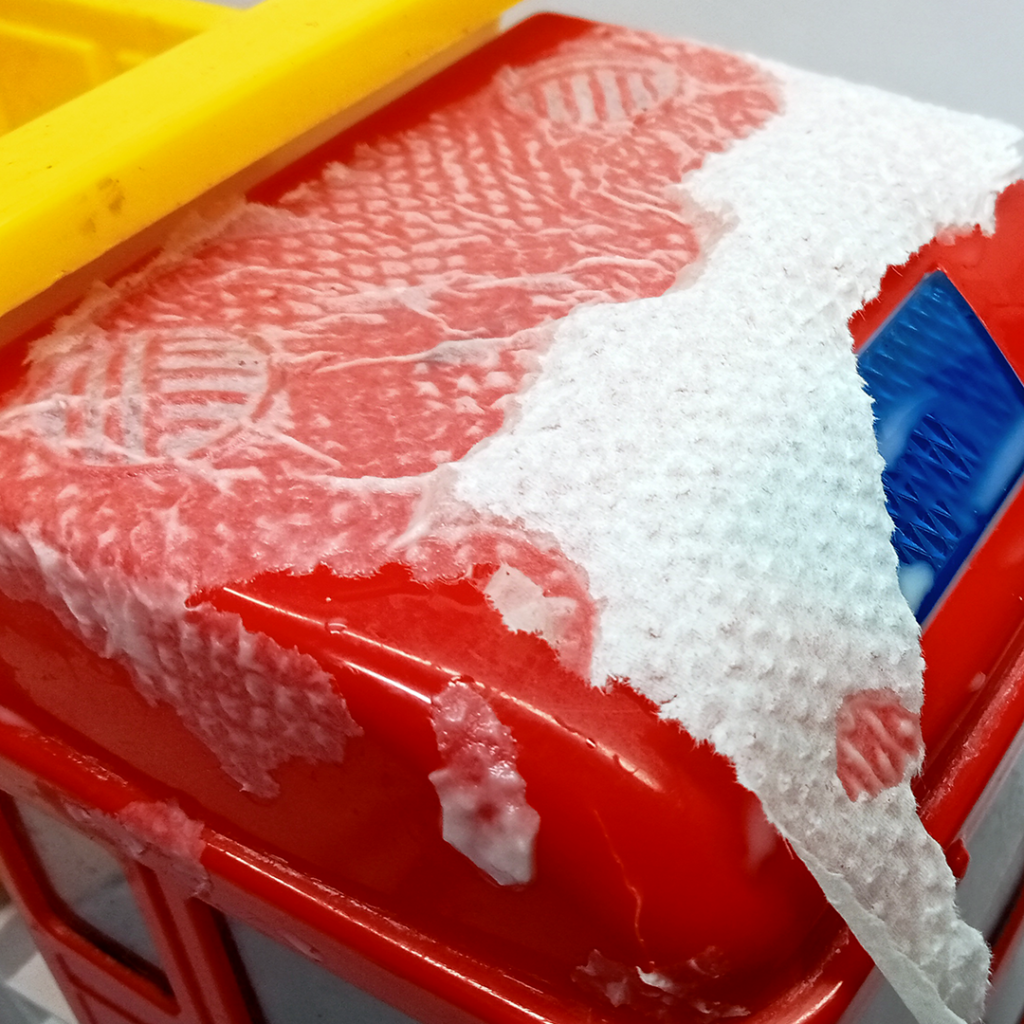
I followed the process considering that horizontal surfaces are more prone to damage from continuous exposure to dust, rain, and sunlight, resulting in more rust compared to vertical surfaces. I began with the roof of the cabin, applying glue with a brush and using tweezers to apply torn tissue paper.
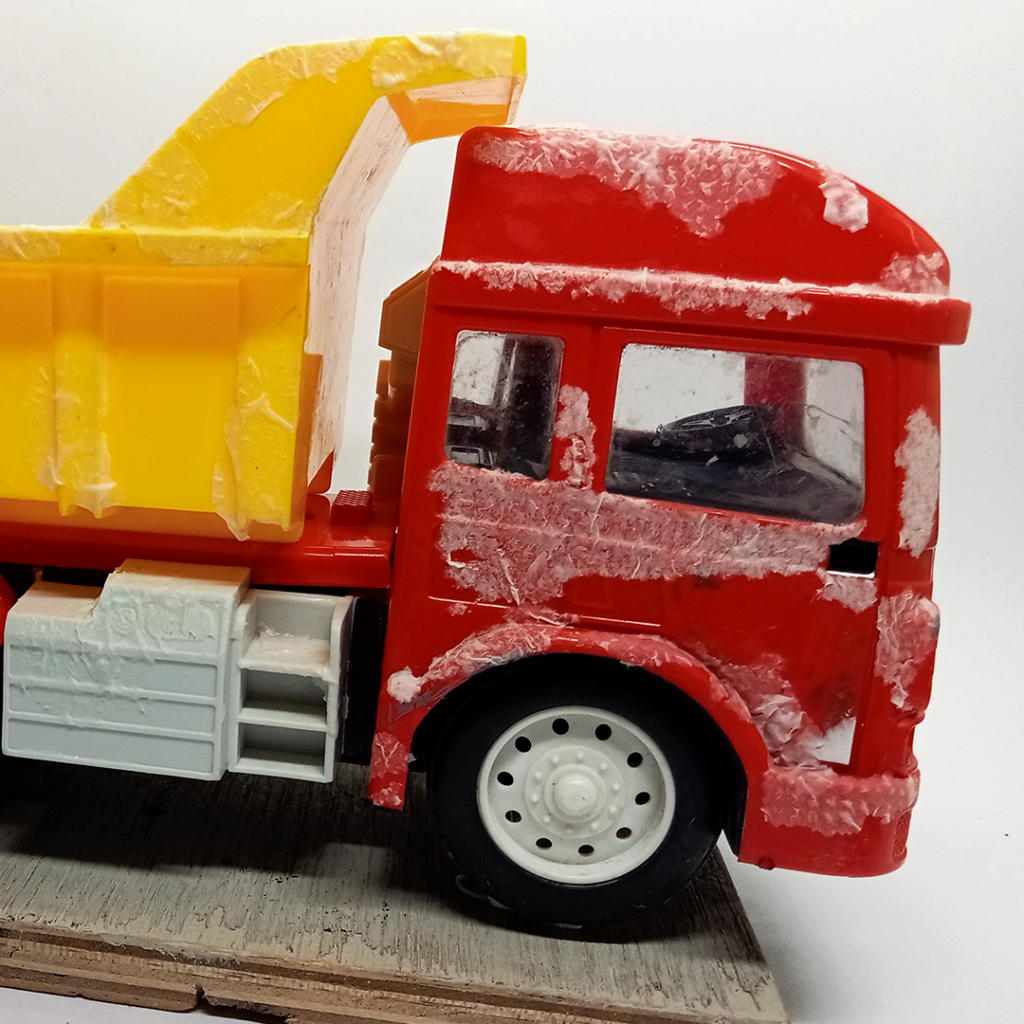
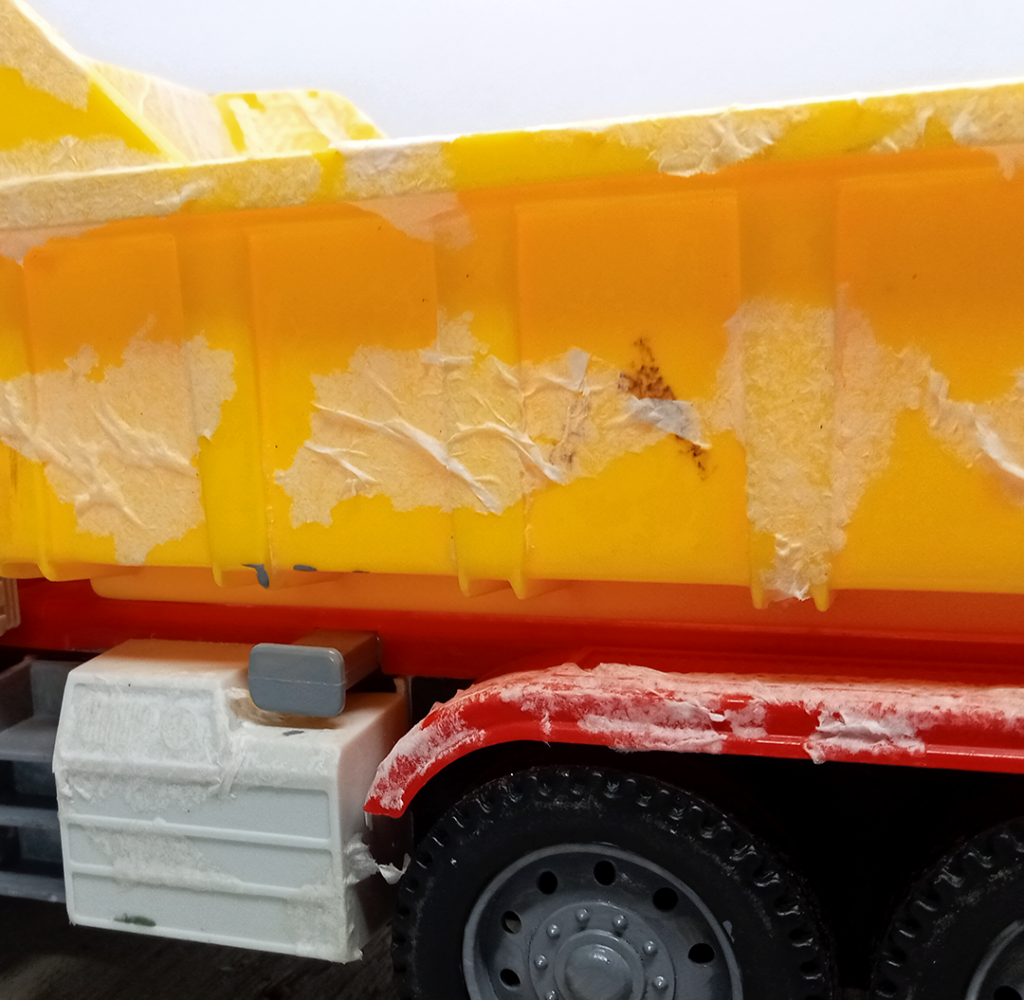
This is how it looks after applying tissue paper to achieve the desired rustic appearance. It created a rough texture on the truck body surface.
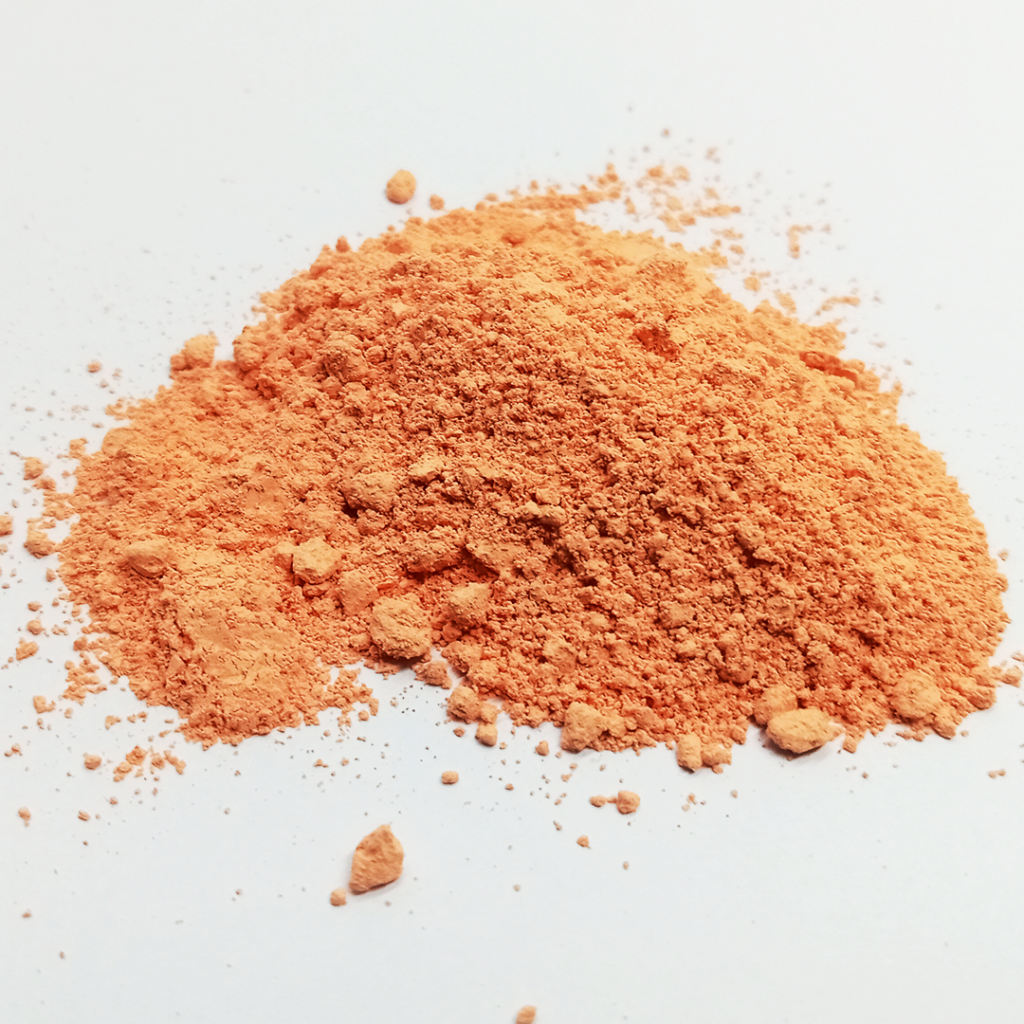
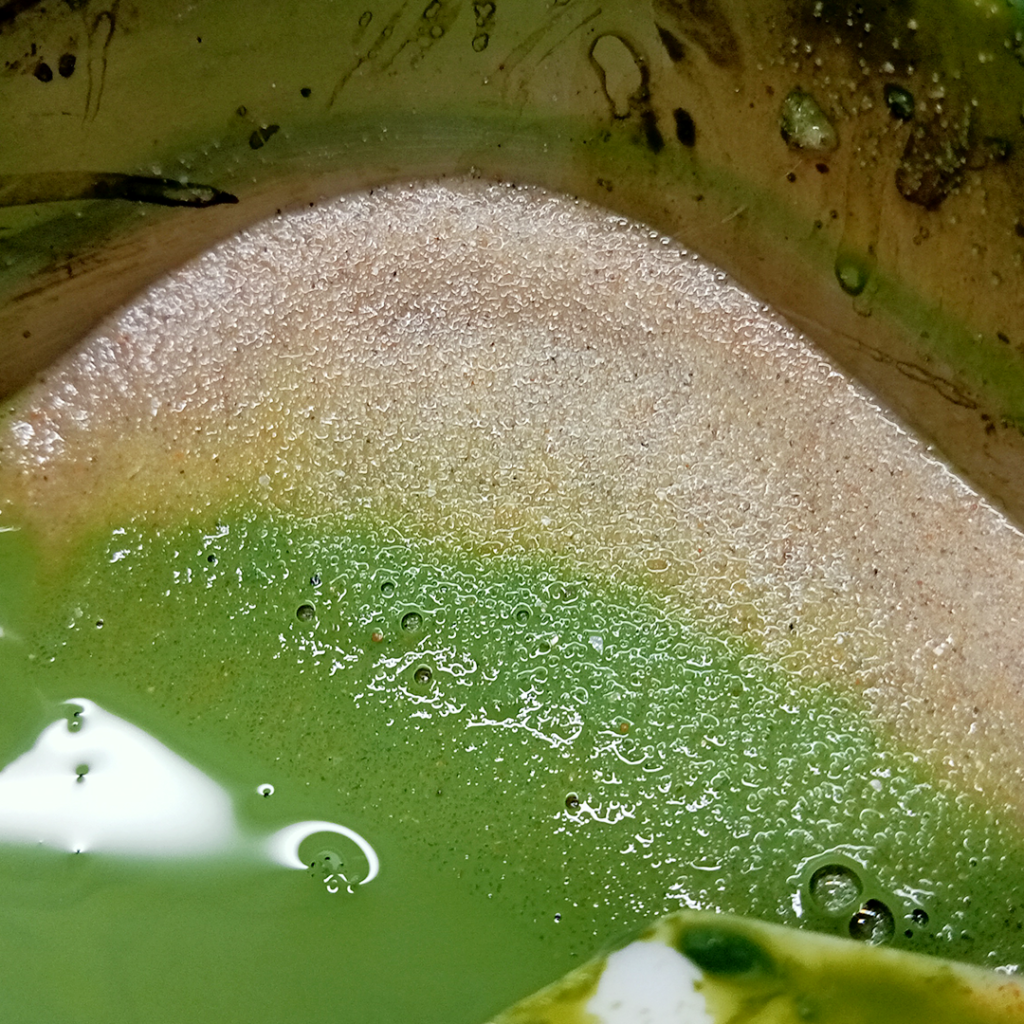
To achieve a grainy texture along with the rust surface, I used crushed brown chalk converted into powder. Chalk was chosen for its ability to blend easily with the tissue texture and absorb water, making it easy to modify the texture appearance.
I sprayed water all over the truck, then blew chalk powder onto the wet surface, and let it dry.
Making display base
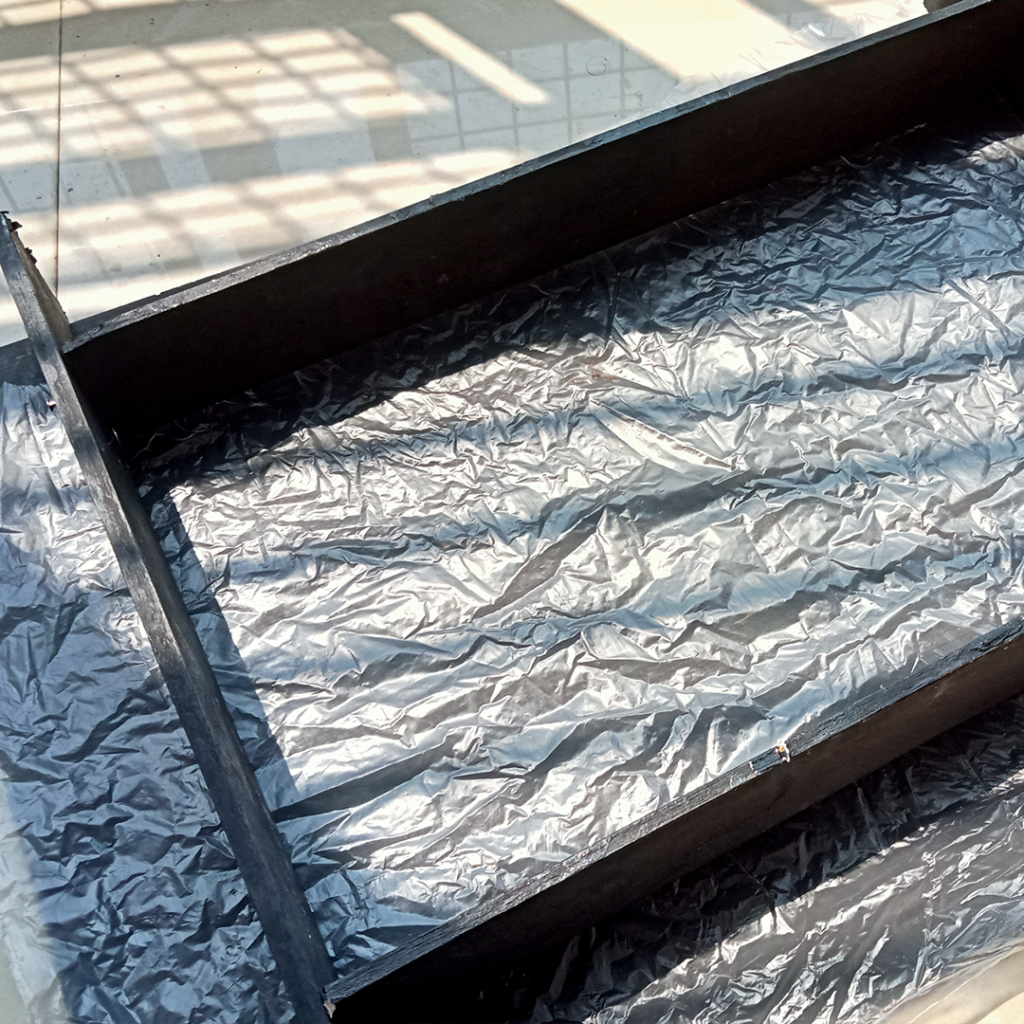
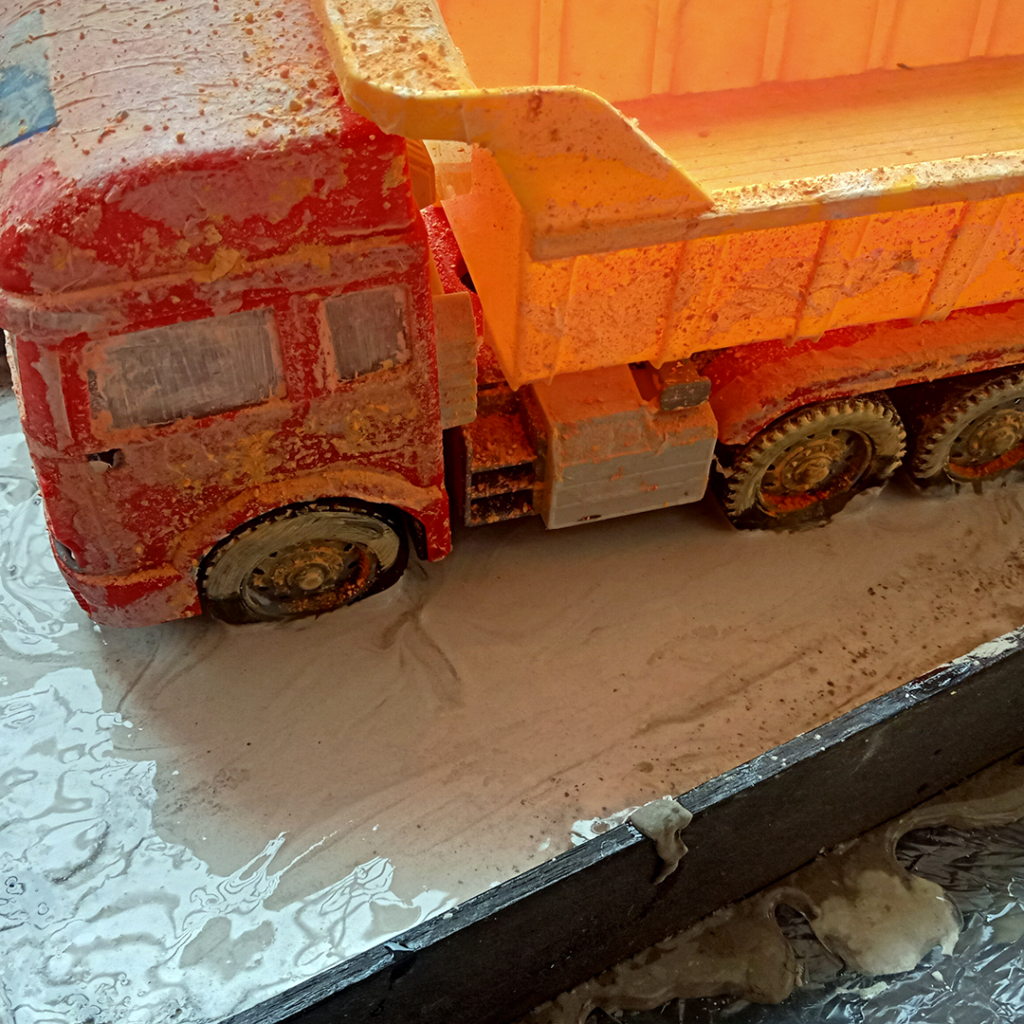
To mount and display the truck, I need to create a sturdy base. Initially, I crafted an enclosure with wooden beading in a rectangular shape slightly larger than the truck’s size. I poured a cement mixture into the enclosure, filling it to about 1 inch in height. I placed the truck on top to create wheel imprints. I left it for three days, soaking it in water daily and allowing it to dry to ensure it solidified properly.
Coloring process
I removed any unwanted powdered texture using a brush. This process allowed me to adjust the intensity of the powdered texture.
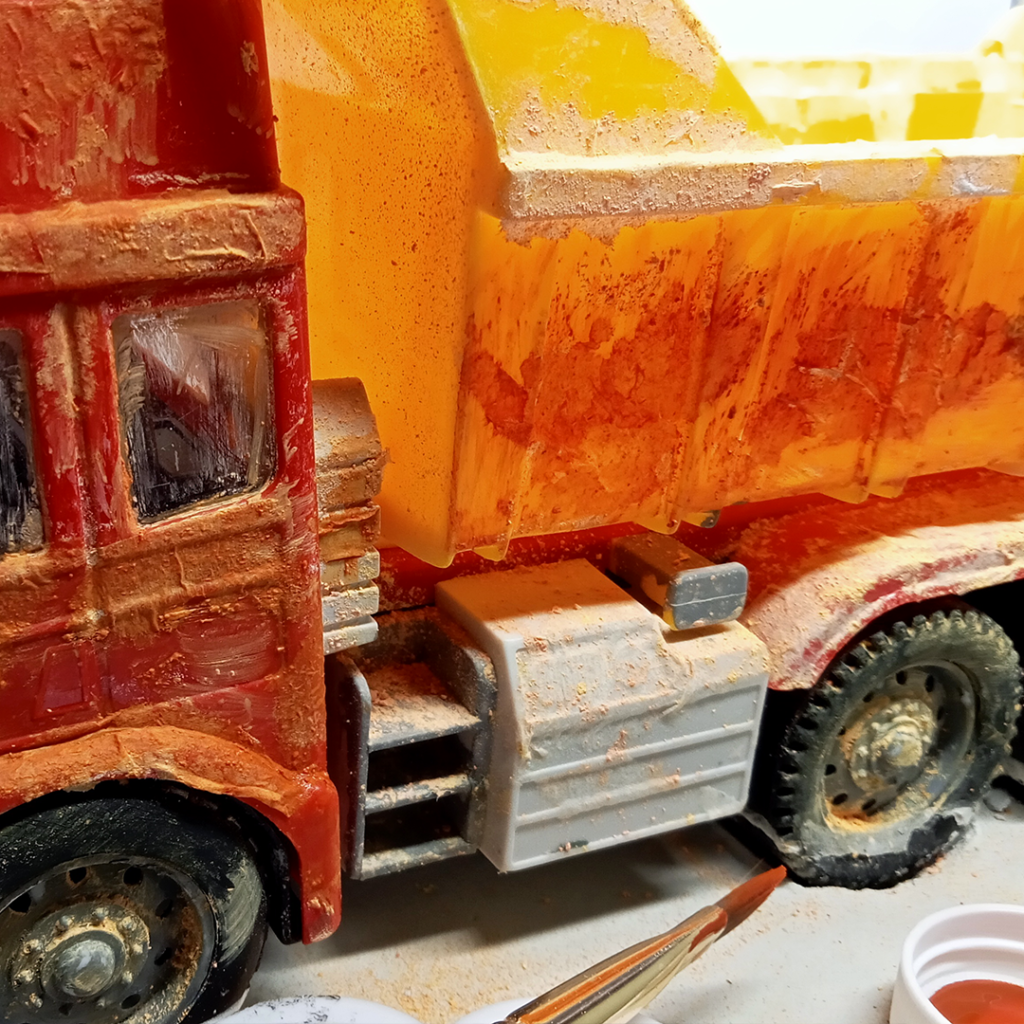
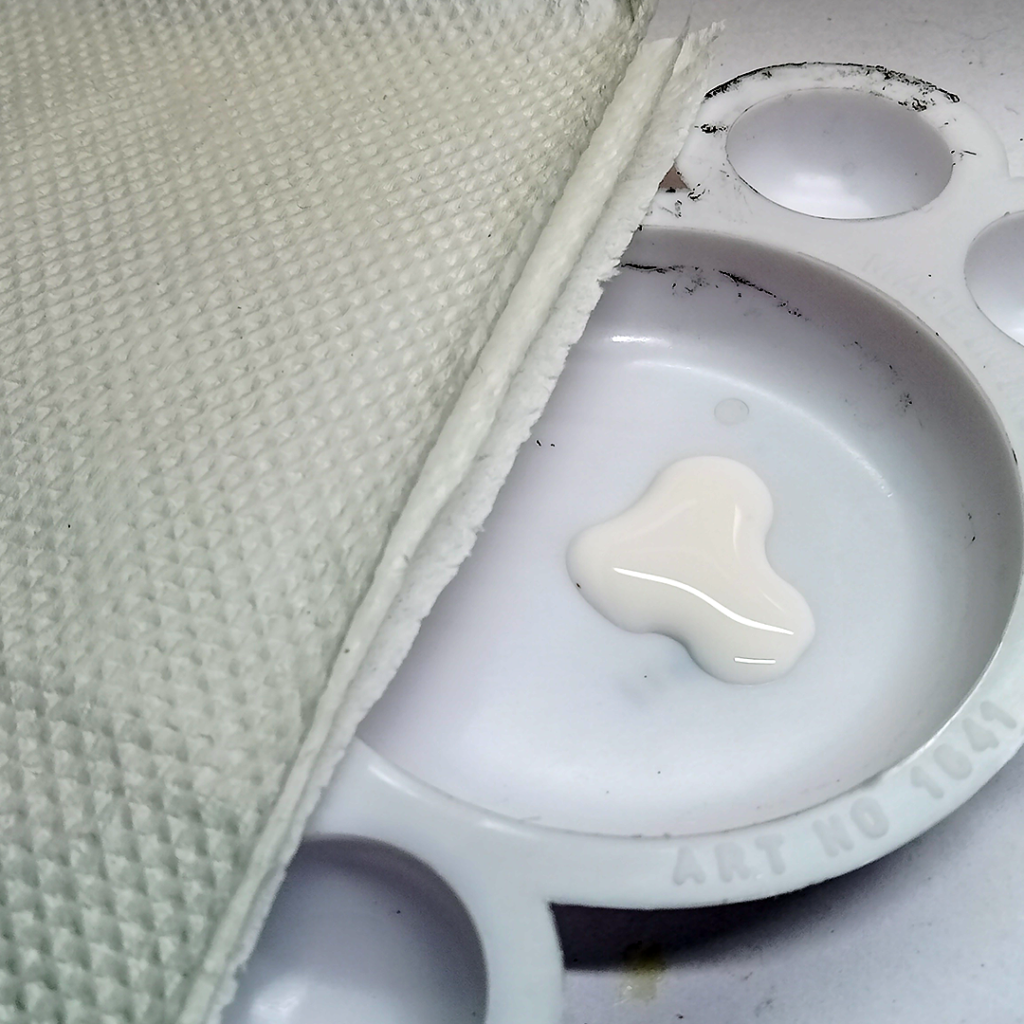
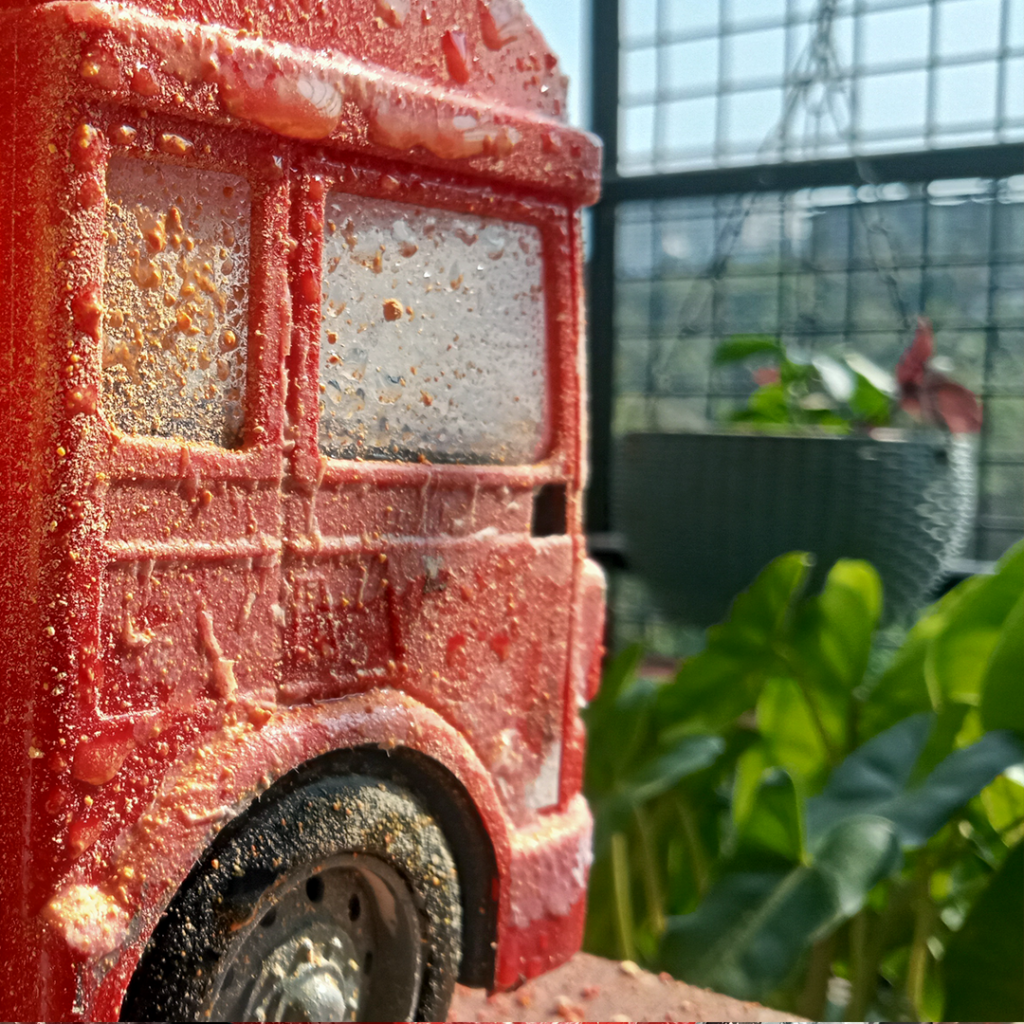
I began by applying a light wash of brown acrylic paint (Indian Red-10 color), focusing on the tissue paper, using a brush. Then, I applied a darker shade of the same brown for a second coat.
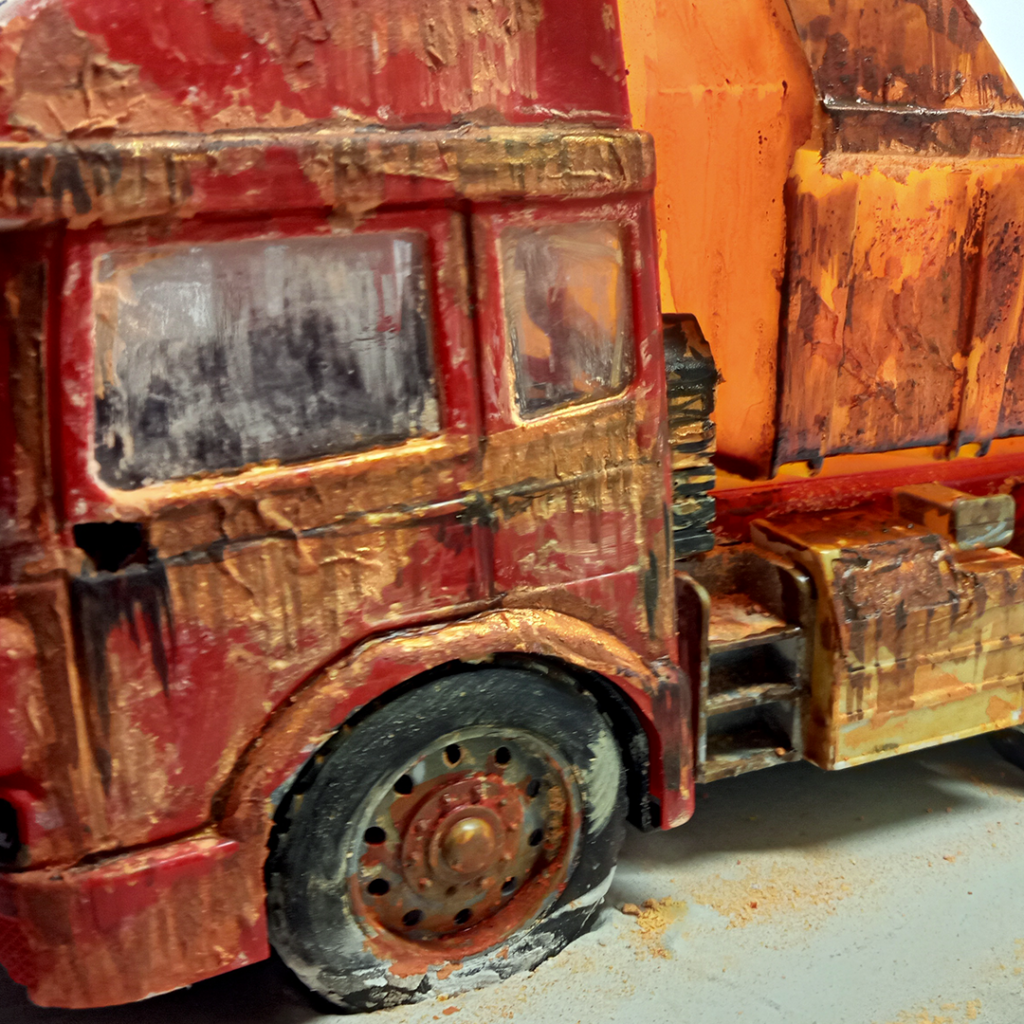
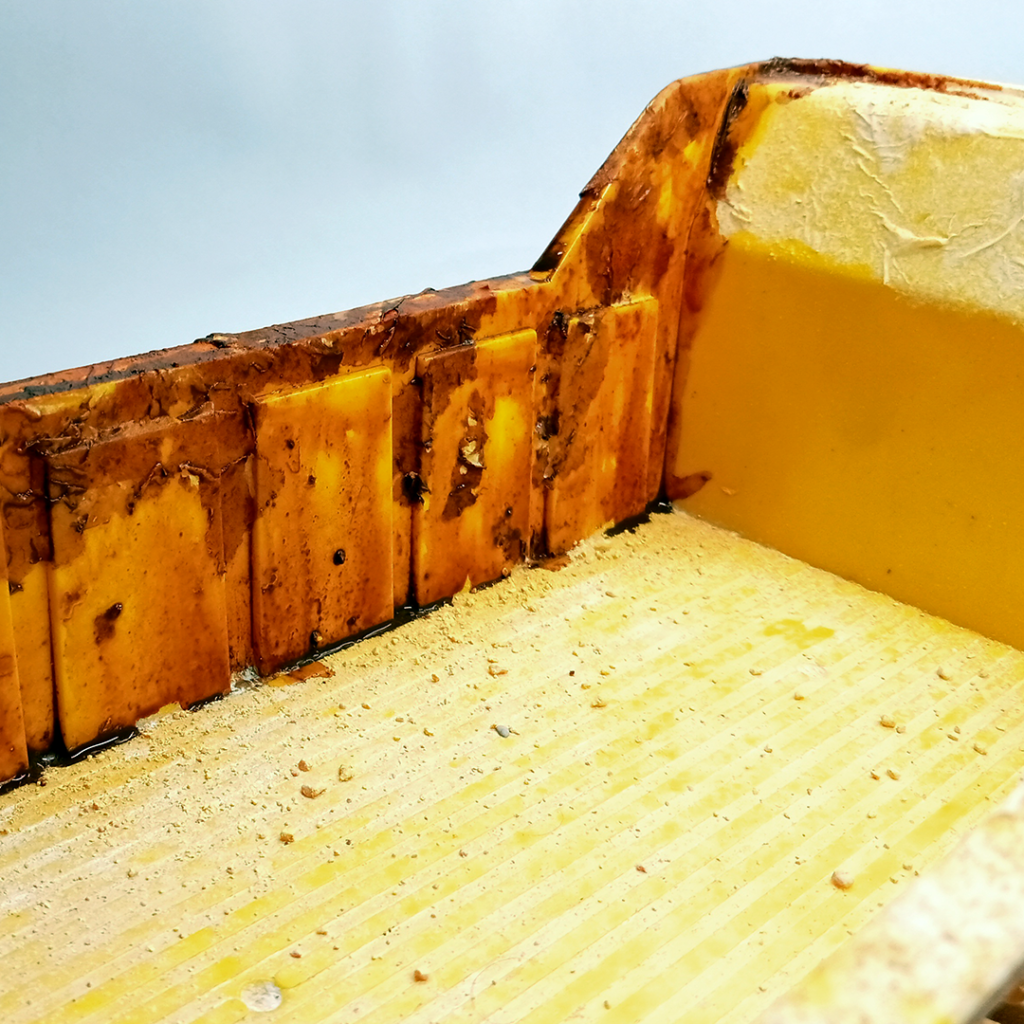
To refine the rust texture, I used darker shades of the same brown color mixed with black. Using a round-point brush (No.2) and a flat brush (No.8), I carefully applied these colors. The tissue paper created bumps and scratches during the process, enhancing the realistic rust texture. I also applied a metallic yellow color (Pearl Desert Gold 313) to the edges to achieve a metallic wet look.
Creating Grass and Foliage
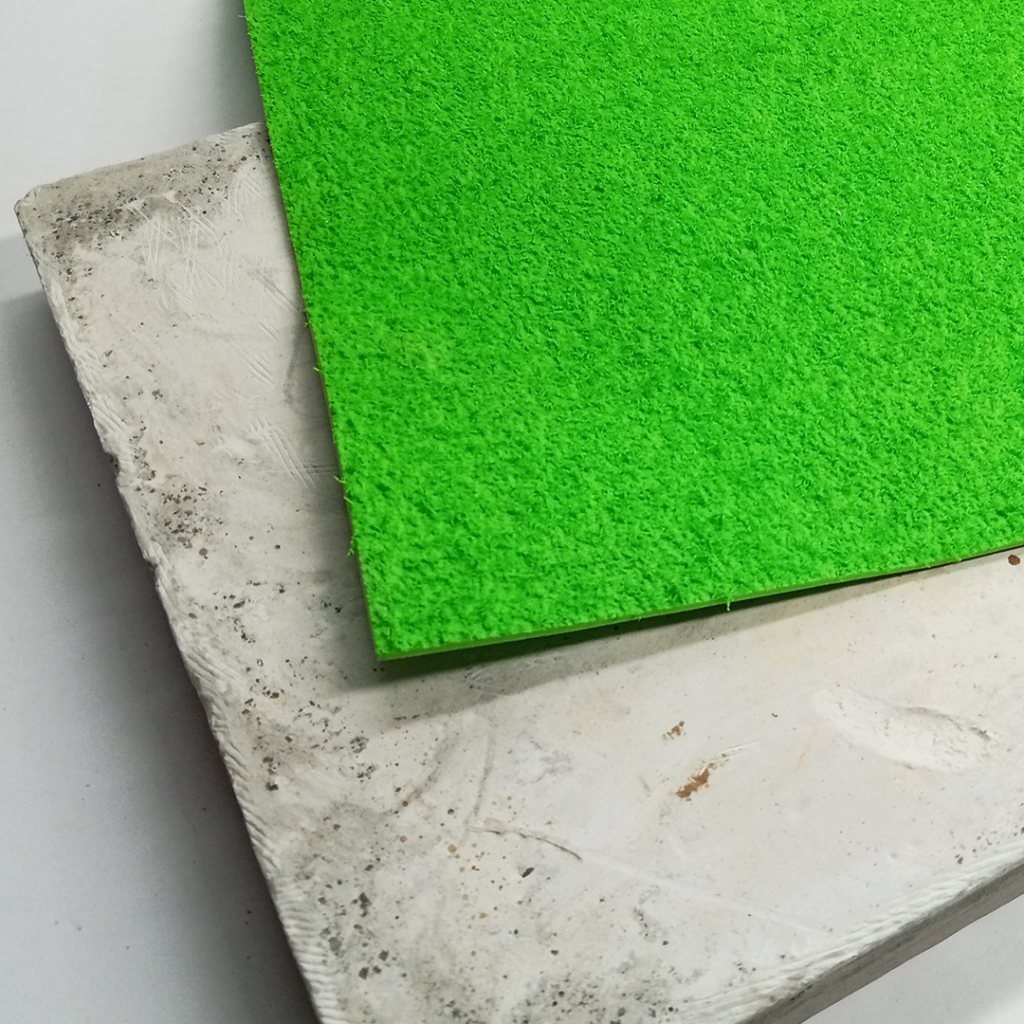
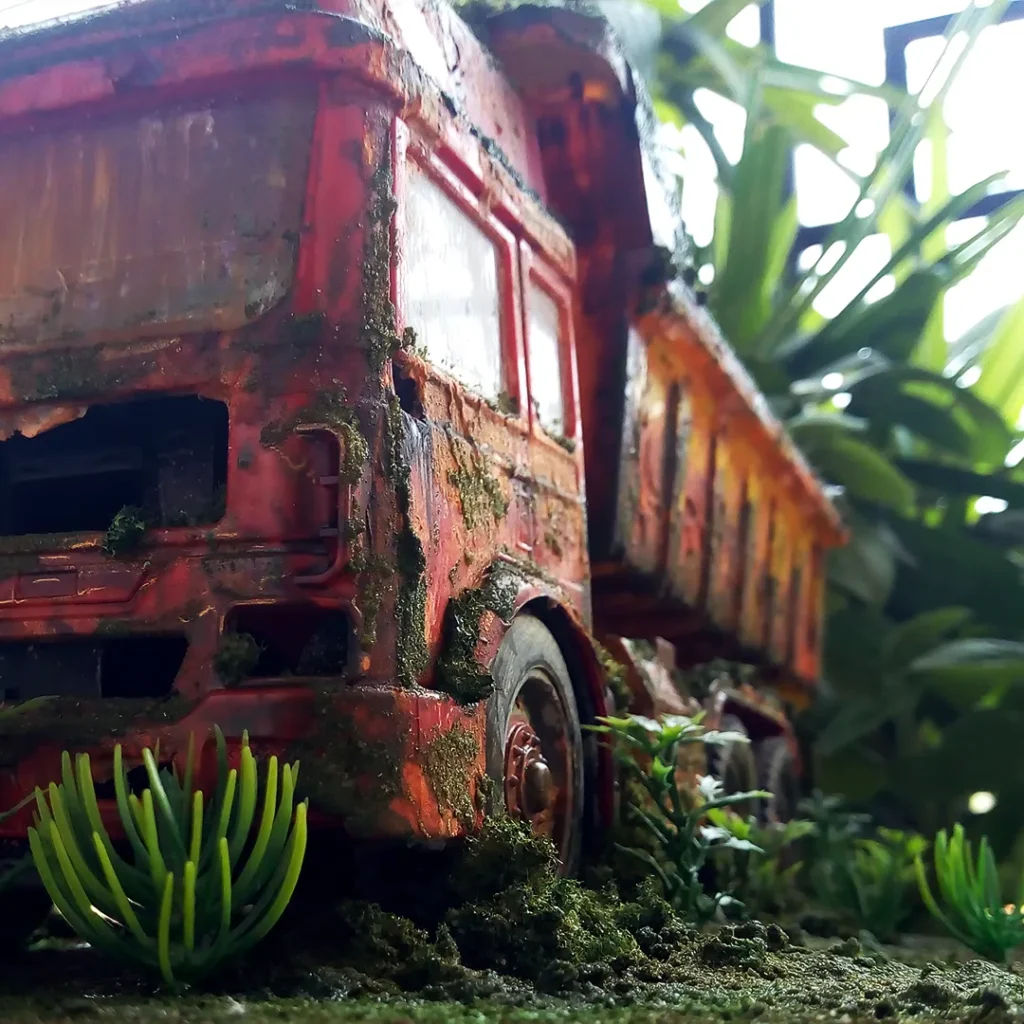
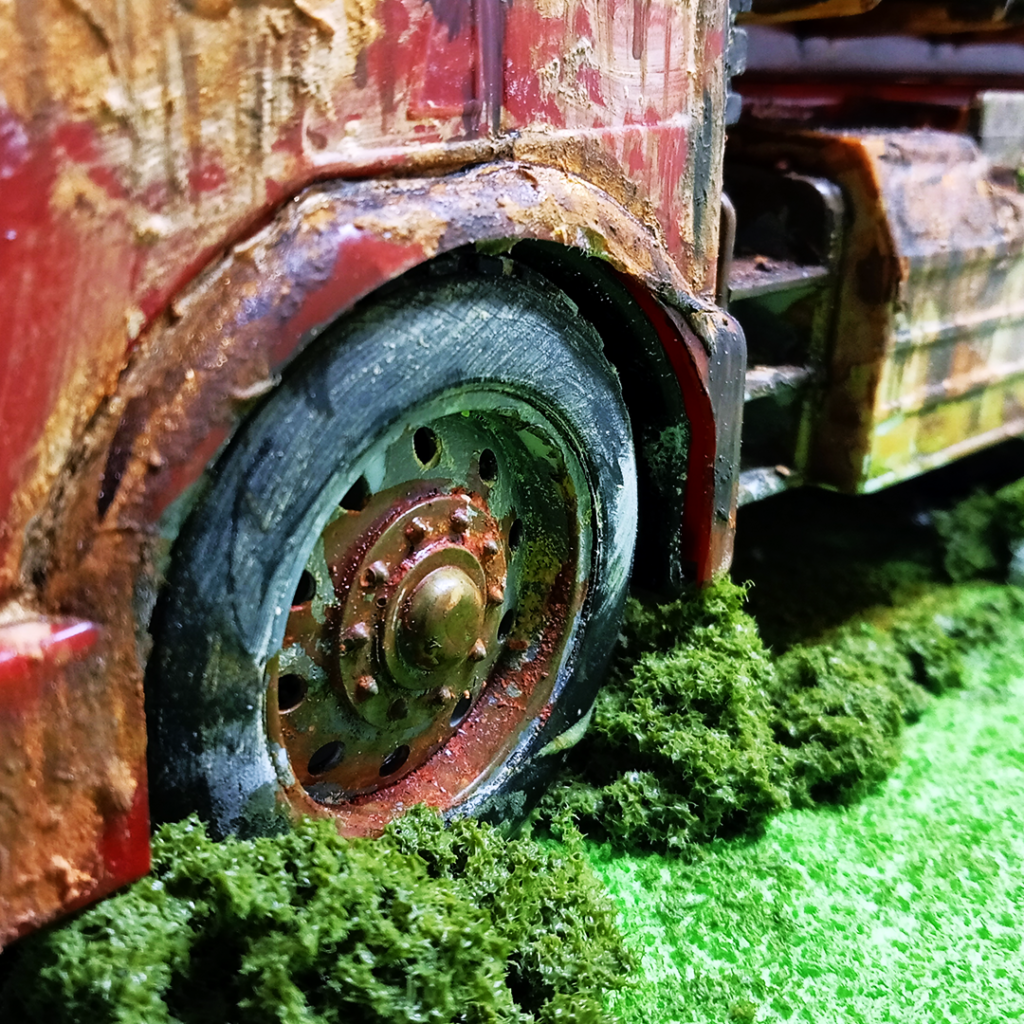
For the grass, I utilized a pre-made grass texture material and applying it to the cement base.
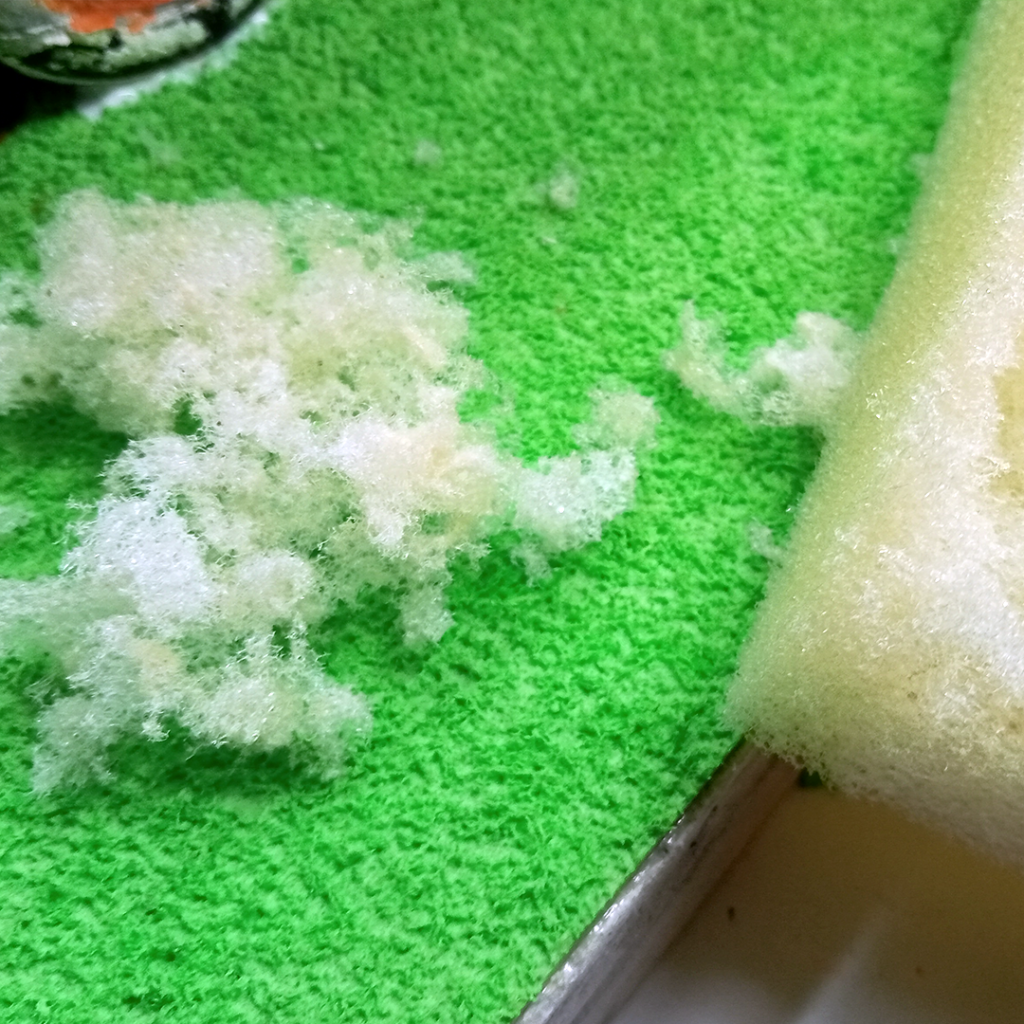
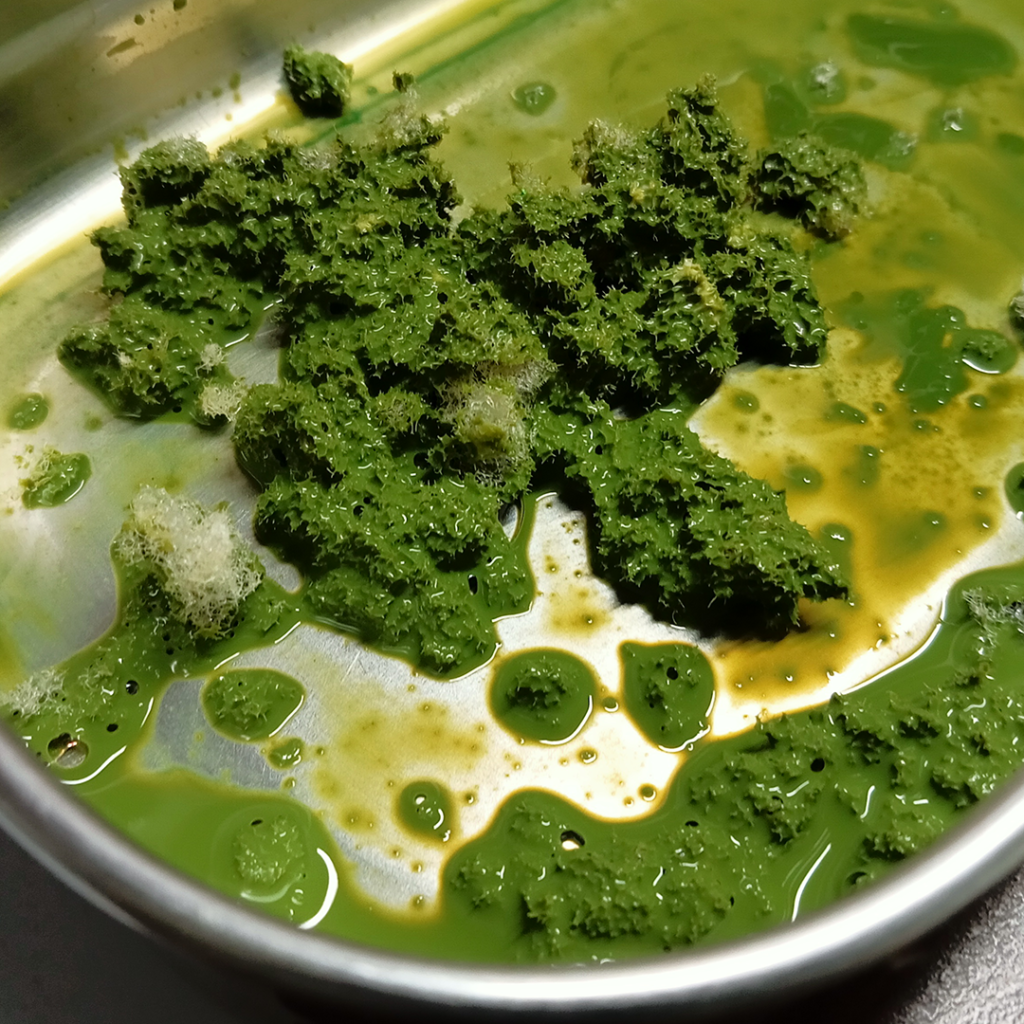
To create small plants, I crushed sponge material using a metal brush to get the right texture. Then, I mixed the crushed sponge with green acrylic paint (Olive Green 281).

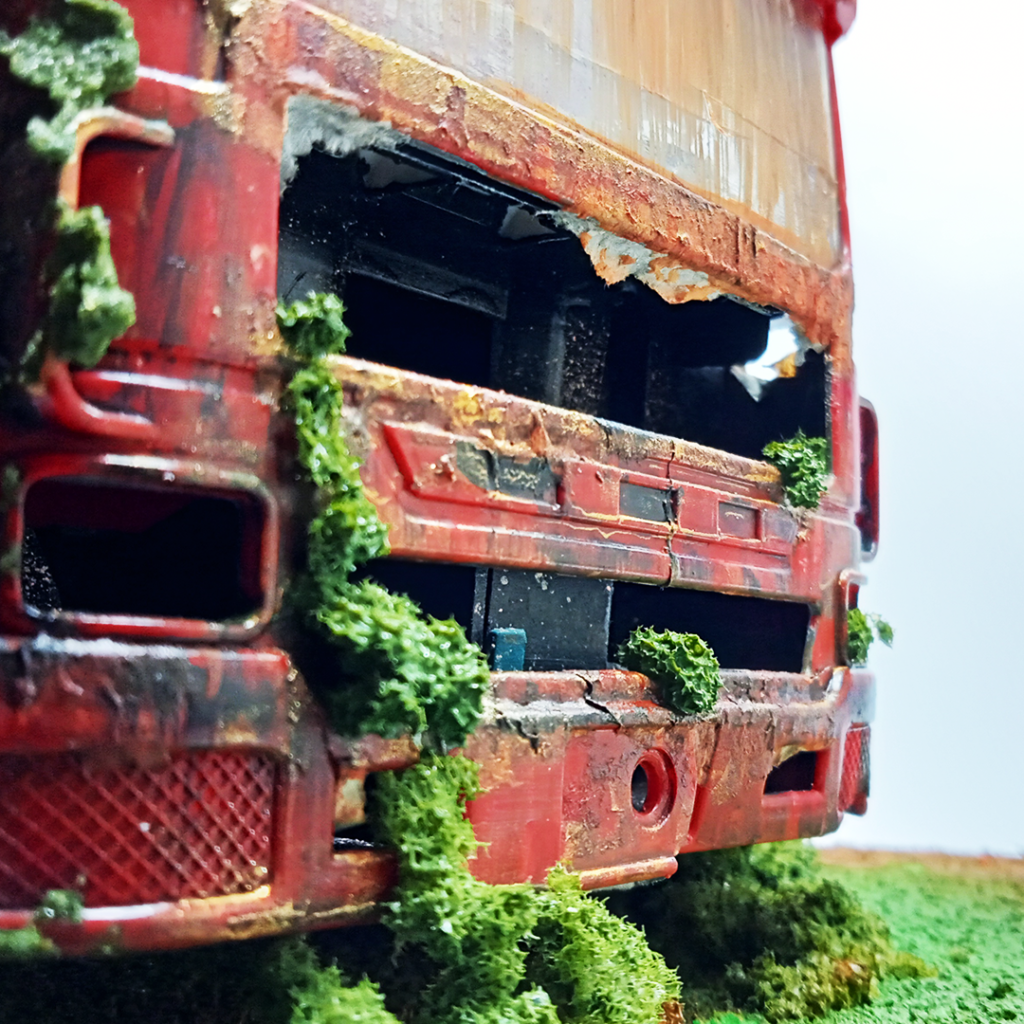
I arranged the crushed sponge pieces as small plants on the truck surface using tweezers. After positioning each piece, I applied thick drops of the same green acrylic paint to ensure they stuck securely together.
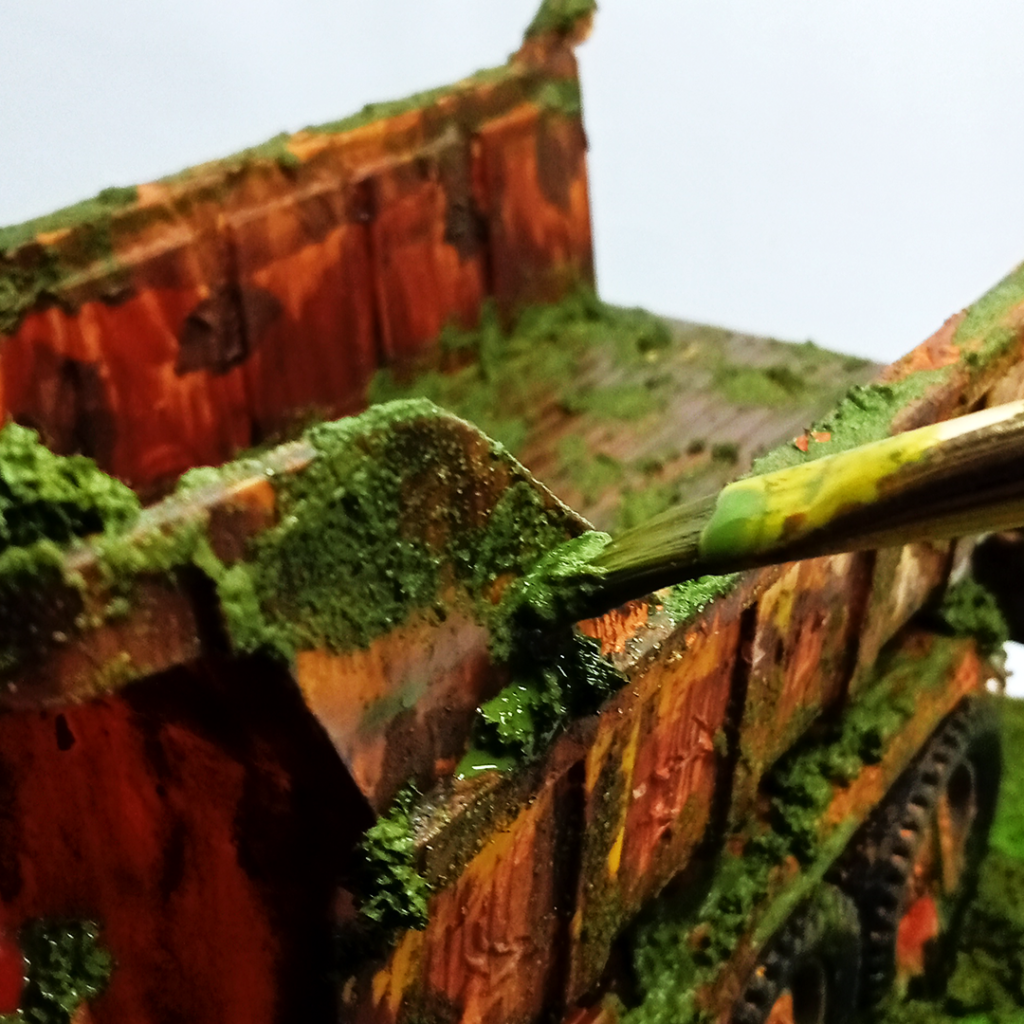
Making Moss
To create the moss, I mixed sand with green acrylic paint. Then, I used a brush to apply the colored sand to create moss on the surface of the truck.

I used a round stencil sponge to apply a mixture of light green (Greenary 67) and metallic green (Green 264 metallic) colors, giving the grass and plants a wet look. Additionally, I used pre-made plastic plants to enhance the realistic and lush greenery of the scene.
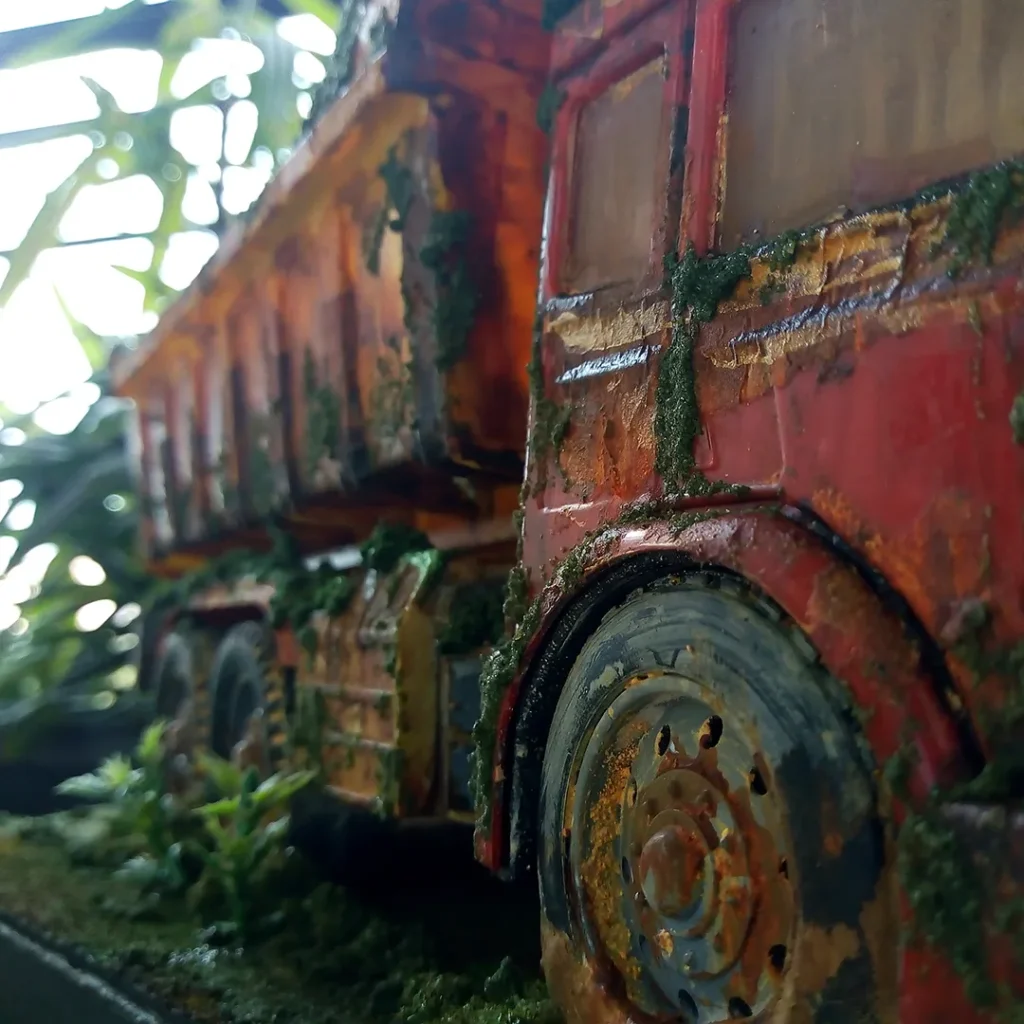
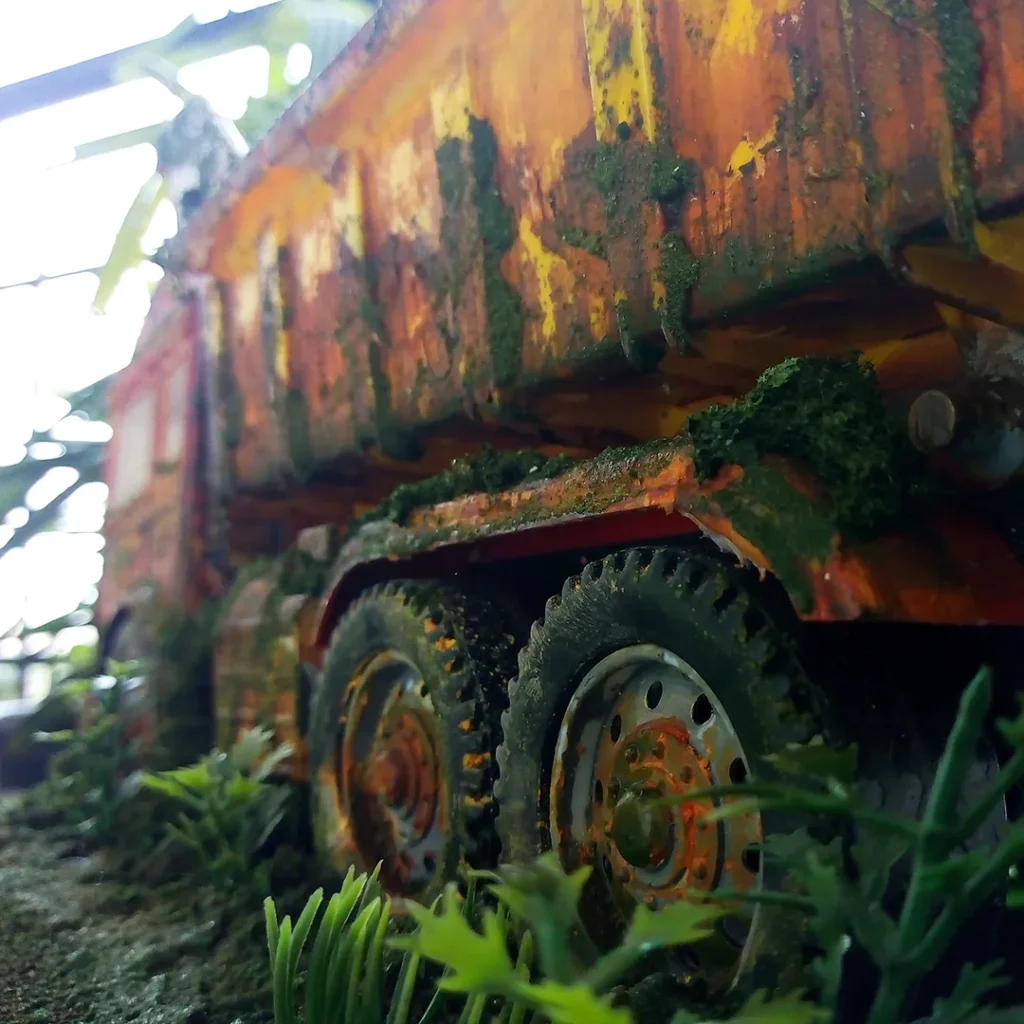
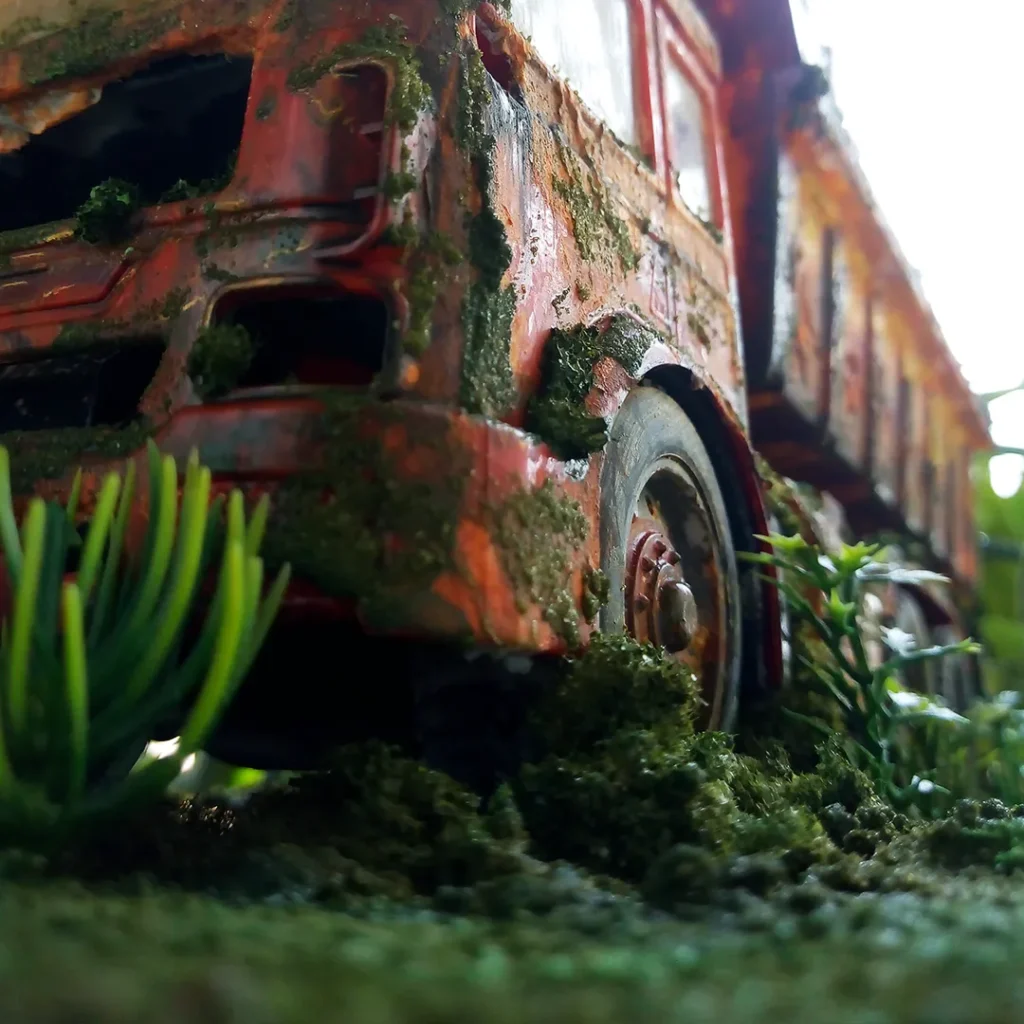
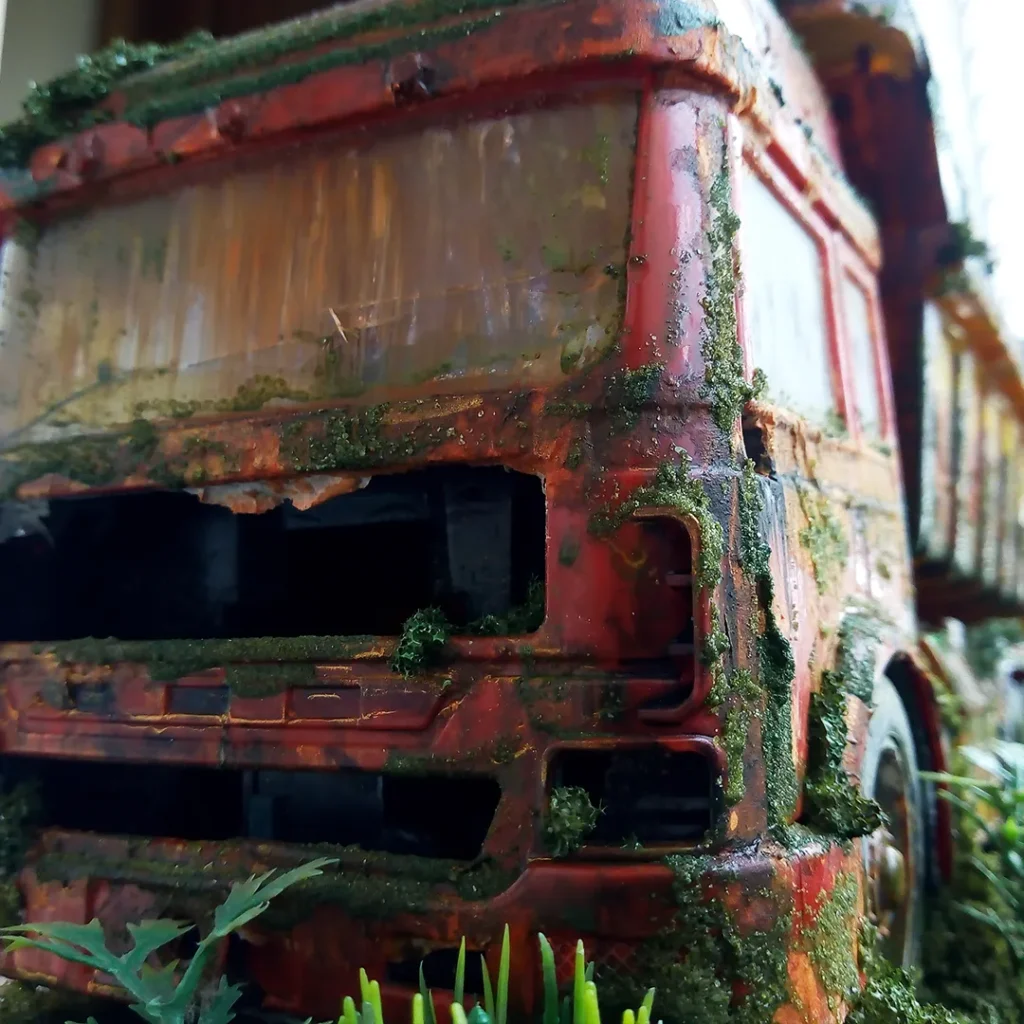
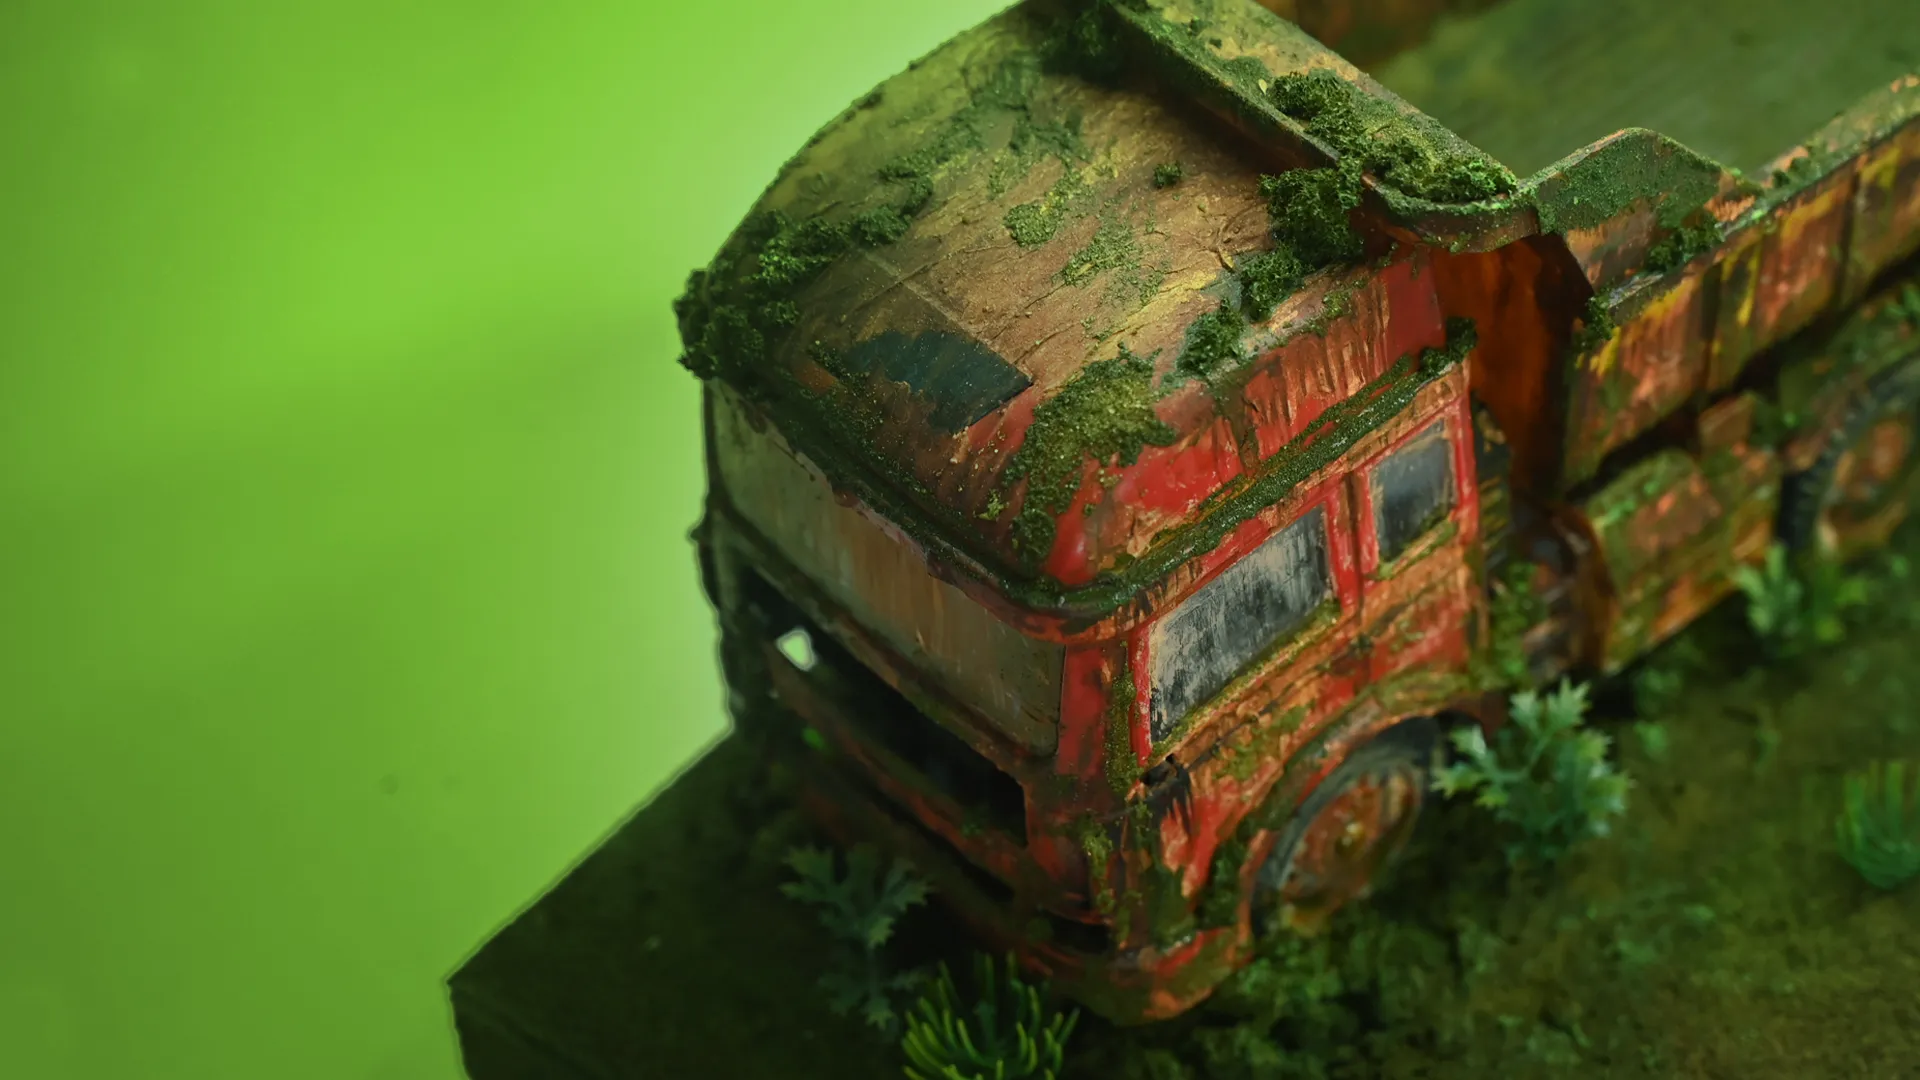
And finally, this is how it looks Miniature Abandoned Truck Model.